3D Flower Birthday Card
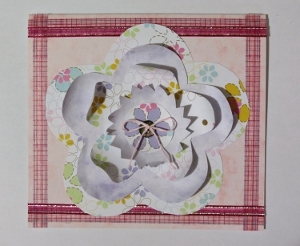
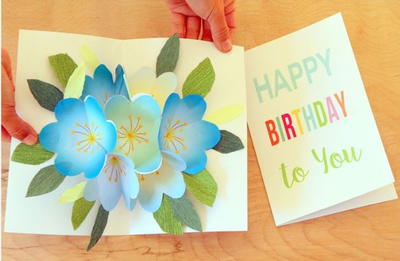
Wish someone a happy birthday with the 3D Flower Birthday Card. This tutorial will teach you how to make a birthday card that won't soon be forgotten. Create a layered 3D flower and use this as the focal point for a birthday card. This birthday card will be ideal for a nature lover for sending warm wishes to a friend celebrating a birthday in the summer months. The blooming flower on the front of the card will make the recipient feel special and is bound to bring a smile to her face.
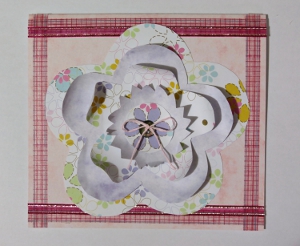
Materials:
- Five Printouts of the Provided Pattern
- 11.4” x 6.3” Light Pink Marbled Cardstock
- 12” x 12” Floral Scrapbook Cardstock
- Light Purple Marbled Cardstock
- Pink and Blue Square Grid Washi Tape
- 0.2” Wide Silver Edged Cerise Pink Organza Ribbon
- 0.3” Wide Abalone Shell Button
- Light Pink Paper Craft String
- Elmer’s Poster Tack
- Pencil
- Ruler
- Scissors
- Quick-drying Craft Glue
Instructions:
1. Score the 11.4” x 6.3” light pink marbled cardstock in half to create a card sized 5.6” x 6.3”.
2. With the fold at the top, “frame” the card with the Washi tape and cut off any protruding edges.
3. Glue the silver edged cerise pink organza ribbon in place at the top and bottom of the card, slightly overlapping the Washi tape.
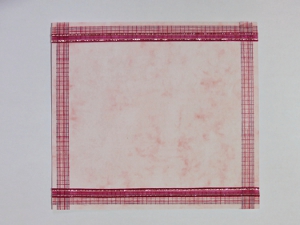
4. Use Elmer’s Poster Tack to stick a printout of the pattern onto the floral scrapbook cardstock and cut out Flower 1 from the scrapbook cardstock. In the same way, also cut out Flower 3 and Inner 2 from the floral scrapbook cardstock.
5. Use Elmer’s Poster Tack to stick another printout of the pattern onto the light purple marbled cardstock and cut out Flower 2. In the same way, also cut out Inner 1 from the light purple marbled cardstock.
6. Start with Flower 2: Use the pencil to roll the rounded point of each flower petal inwards to create a curved petal. Add a small drop of glue to the middle of Flower 1 and glue Flower 2 on top of Flower 1.
7. Now use Flower 3: Use the pencil to roll each flower petal inwards. Add a small drop of glue to the middle of Flower 2 and glue Flower 3 on top of Flower 2.
8. Now use Inner 1: Use the pencil to roll the sharp points of Inner 1 inwards. Add a small drop of glue to the middle of Flower 3 and glue Inner 1 on top of Flower 3.
9. Glue Inner 2 on top of Inner 1.
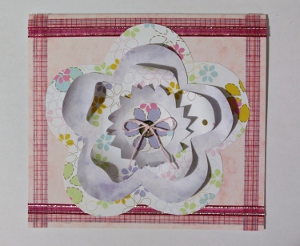
10. Add glue to the back of Flower 1 and add the completed flower to the front of the card.
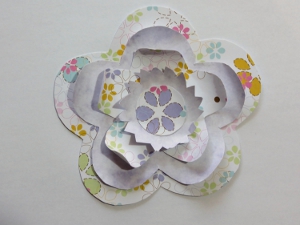
11. Thread the paper craft string through the button’s holes and make a small bow. Neatly cut off the ends of the paper craft string and glue the button to the center of Inner 2.
Read NextHand Embroidered Birthday Cards
Your Recently Viewed Projects
Daughter of Light
Jun 19, 2018
This card is an interesting idea! I like the way the flower is definitely the central focus piece. It gives it varied texture and elevates the flower from the background. I think I might try this flower with various shades of pinks along with different textures with each ring and then lighten the background. I love the way the artisan has juxtaposed the graphic lines of the washi tape to the softness of the flower. Nice work!
Report Inappropriate Comment
Are you sure you would like to report this comment? It will be flagged for our moderators to take action.
Thank you for taking the time to improve the content on our site.

