Floral Fusion Homemade Birthday Card

Turn an adult coloring page of flowers into a spring-themed birthday card for a family member or friend. For this Floral Fusion Homemade Birthday Card, use gilders paste and watercolor pencils to add a vintage feel to the background, and color the design with watercolor pencils. The colorful flowers on this DIY card is the perfect way to celebrate the start of spring, although it is so pretty that it is sure to be appreciated any time of year. This is a lovely paper craft for practicing your art skills as well.
Time to CompleteIn an evening
Primary TechniquePaper Crafts
Project or Page SizeCard
Type of Paper UsedCardstock

SeasonSpring
Materials List
- A copy of the provided adult coloring design
- 8.2" x 5.6" light purple marbled cardstock
- Set of watercolor pencils (a 24-color set of Marco Raffine pencils were used in this version)
- Bronze gilder’s paste wax
- Cotton ear buds
- Quick-drying craft glue (such as Bostik Clear)
- Scissors
- Ruler
Instructions:
-
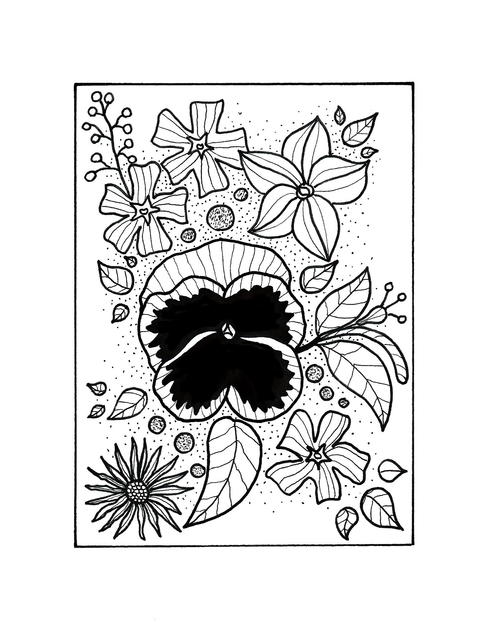
Click here to download a copy of the design. Print the adult coloring design onto a sheet of white A4 paper. You can use ordinary printer paper, but if you are planning on using watercolor pencils, like in the example, you might need to use cardstock or paper with a medium weight.
-
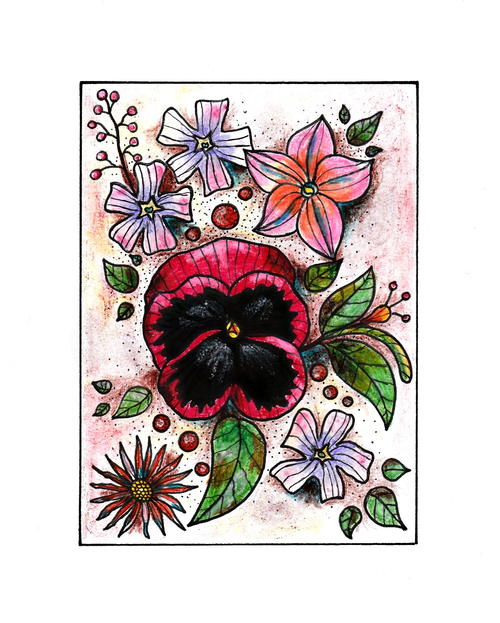
First color the background. Create a vintage effect - apply gilder’s paste with cotton ear buds to certain parts of the background. Then, working dry on dry (use the pencils as is, do not wet the pencils or the paper) add more color to the background. Use colors like burnt sienna, yellow and yellow ochre to complete the vintage feel.
-
Use the watercolor pencils to color the flowers and leaves. Working wet on dry (slightly wet the tip of the pencil before coloring), color the design. Use the turquoise blue and burnt sienna pencils to add shadows around the flowers and leaves. Cut out once completed.
-
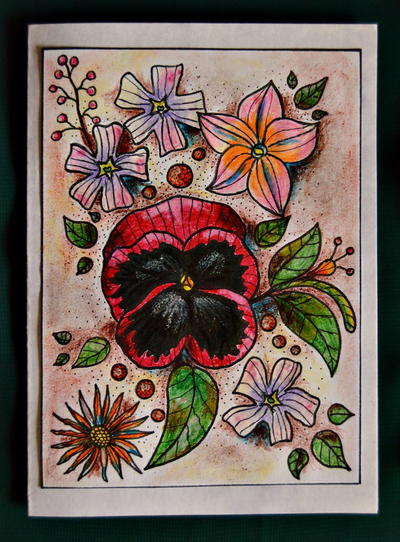
Score the light purple marbled cardstock to create a card sized 5.6" x 4.1".
-
With the fold at the left, center and glue the colored design to the front of the card.
Read NextEmbossed Birthday Card
Your Recently Viewed Projects

Thanks for your comment. Don't forget to share!
Report Inappropriate Comment
Are you sure you would like to report this comment? It will be flagged for our moderators to take action.
Thank you for taking the time to improve the content on our site.