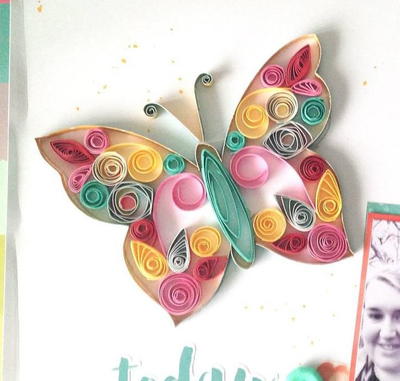
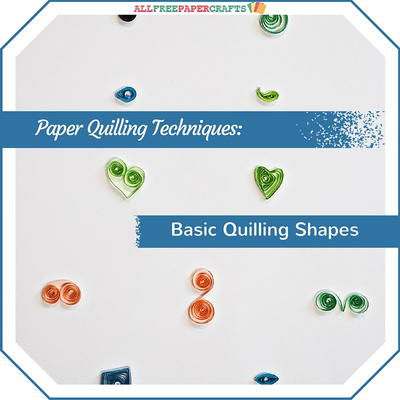
Paper Quilling Techniques: Basic Quilling Shapes

If you want to learn how to do paper quilling, learn the basic shapes. That way you can complete simple paper quilling projects before moving on to more advanced quilling shapes. In Paper Quilling Techniques: Basic Quilling Shapes, you will learn the most basic quilling shapes, from circles and squares to teardrops and leaves. Once you have mastered these shapes, you will be able to learn the next most difficult shapes, such as the eccentric teardrops and marquise or the wave and triangle. We are sure that once you learn these shapes, you will want more.
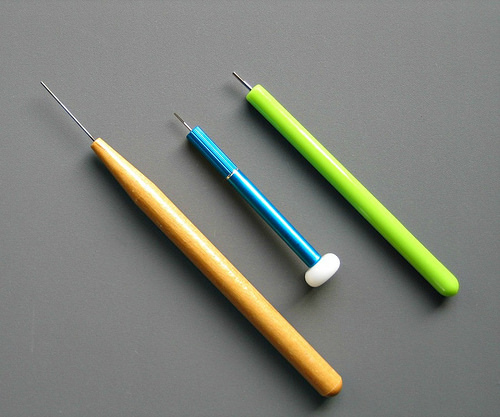
After learning what the most common paper quilling shapes are, you can start to create. That's why we have included a bonus section at the bottom. In this bonus section, you will see links that will teach you the Paper Quilling Tools and Basics and more. After you get your tools, check out the simple paper quilling tutorials to find the best quilling ideas for beginners. If you want more, you'll find our most popular quilling collection on AllFreePaperCrafts. Get ready to be a quilling master!
You can get the full infographic by clicking the link below!
Learn Paper Quilling Shapes:
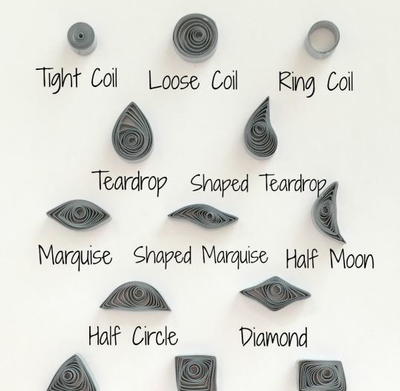
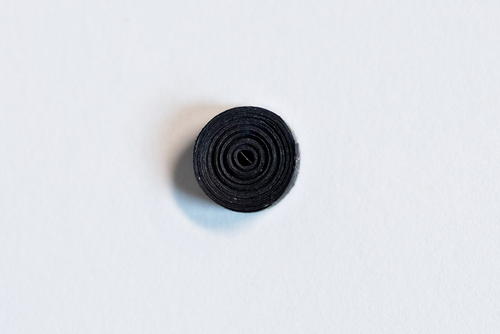
Paper Quilling Coils
-
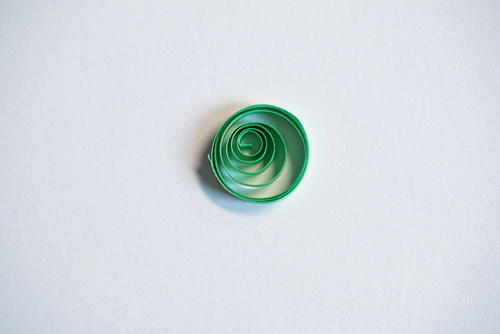
Tight Coil - A tight coil or circle is the most basic shape to learn. Simply use your quilling tool to spin the quilling paper around with tension. Use a shaping board to keep the shape tight.
-
Loose Coil - The loose coil or circle is similar to the tight coil except that when spinning the quilling paper around the tool, you want less tension. You can also use a shaping board so that it relaxes at the size you want. See the projects below for quilling ideas including the loose coil.
Paper Quilling Hearts
-
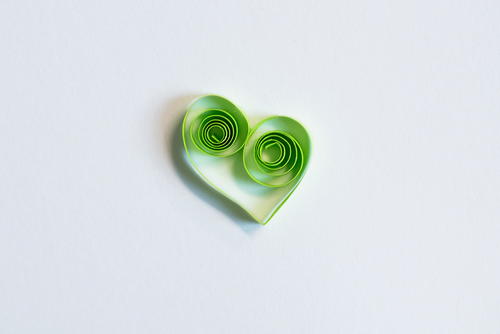
Quilled Scroll Heart - You will find different scroll types below, but to make paper hearts out of quilling paper in this scrolling shape, you will curl the edges and pinch the center, then bend to create a pretty little heart.
-
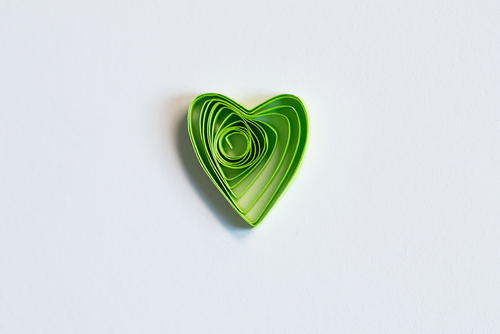
Closed Quilling Heart - This is a more traditional and complete heart. Start with a loose coil and then shape the quilling paper to create a lovely little heart.
Paper Quilling a Teardrop Shape
-
Teardrop Shape - This is a very versatile paper quilling shape, which can be used in all sorts of larger beautiful quilling designs. Similar to the coils, but with a pinched top.

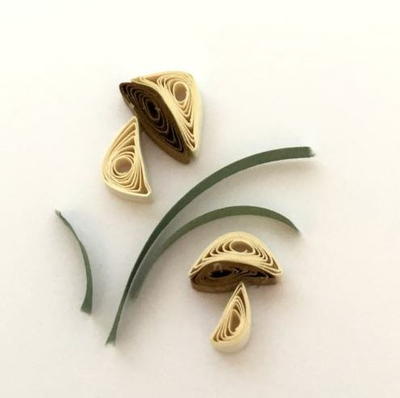
Quilling Leaves
-
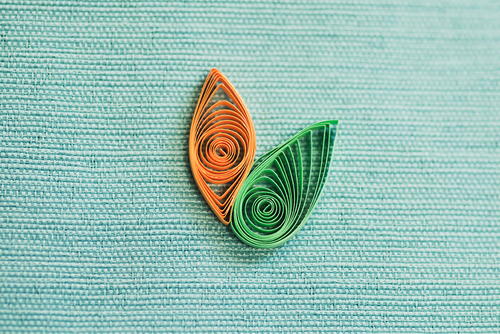
Simple Quilled Leaves - Leaves are another versatile shape because they can be used for flower leaves or petals and range from simple to complex. This simple leaf is very similar to the teardrop but often thinner in shape.
-
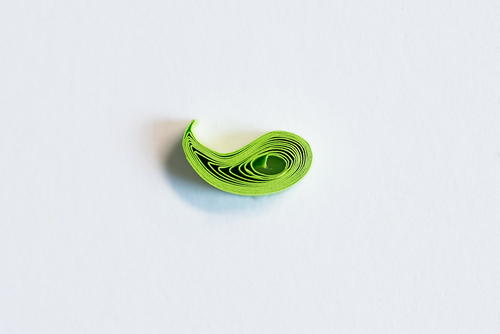
Curved Quilled Leaf - This is also known as a curved teardrop. This is the fancier of the quilled leaf-like shapes. These leaves get a curved shape, which is done by bending the leaf or teardrop shape. Add more or less of a curve as desired for your quilling art pieces.
How to Quill a Marquise Shape
-
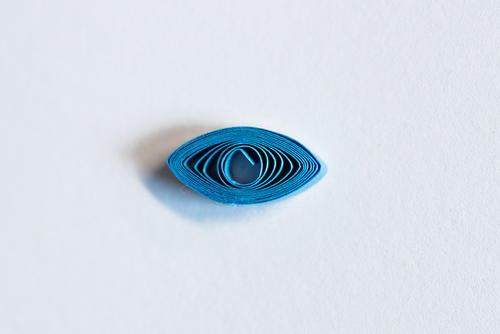
Marquise Shape - A marquise shape looks like an eye. It's basically an oval with the ends pinched. Use this for any sort of accents. It can even be used as a petal or leaf.
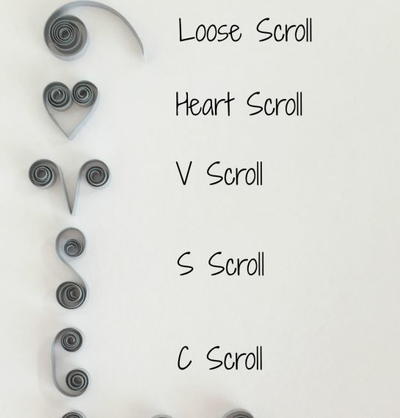
Quill Scroll Shapes
-
C Scroll - If you were to turn this C scroll shape below 90 degrees to the left, you'd see where it gets its name. This fancy shape is super simple as you just have to coil the ends which will leave a curve.
-
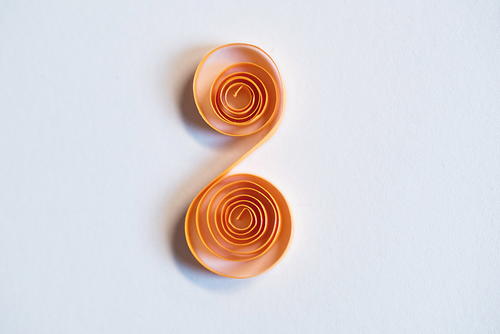
S Scroll - Like the C scroll, this one is aptly named. This pretty curved S shape allows you to decorate any card with incredibly elegant scrolls in as tight or loose shapes as desired. Experiment to get the curves just right.
-
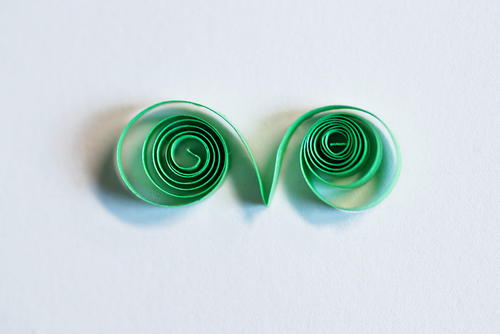
V Scroll - The only difference between the V scroll and the C scroll is that pinch you give the center of the paper quilling strip. With this scroll, you're one step closer to spelling out letters! This shape is a great stem for a flower.

How to Quill Paper Squares
-
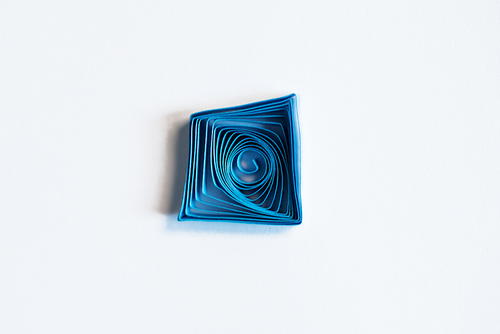
Paper Quilling Square - Quilling squares starts with a teardrop shape that then starts bending into the square shape you see below. With a small tweak, this shape becomes a diamond.
BONUS: Paper Quilling Tutorials
Learn how to master these shapes and make some simple quilling projects. You will love these easy to follow tutorials. First off, learn what kind of paper quilling tools you will need and how to use them. Then dive into these amazing quilling ideas.
Read NextPrincess Paper Quilling Design
Your Recently Viewed Projects
Thanks for your comment. Don't forget to share!
Daughter of Light
Jul 25, 2018
Wow! This is soooo cool! So many wonderful and beautiful things can be made from mastering these beginning shapes! I can even see myself designing my own pieces after I've got these down. It's a very good idea to have the written definition of the shapes as well as these great pictures of them. I really like that Krista linked us to projects that use the specific shapes! It's always easier to practice if you can see where you're headed in the future! Thanks for putting this in one place!
Report Inappropriate Comment
Are you sure you would like to report this comment? It will be flagged for our moderators to take action.
Thank you for taking the time to improve the content on our site.