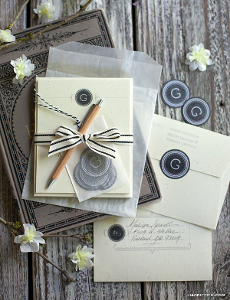
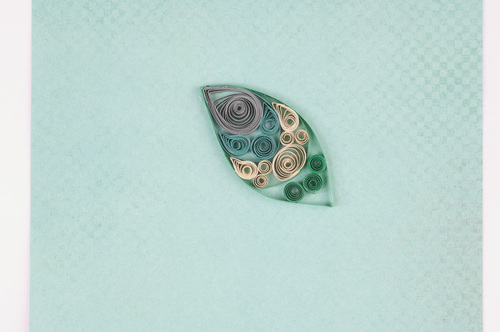
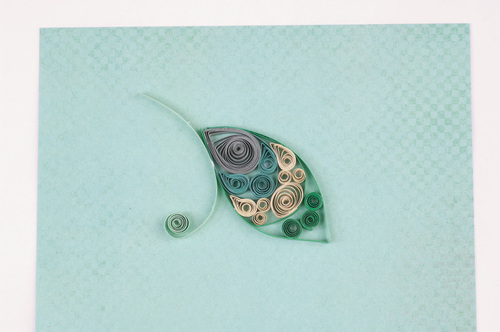
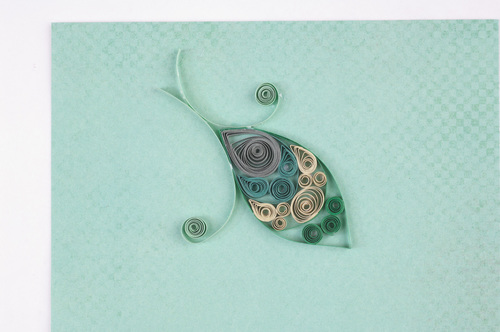
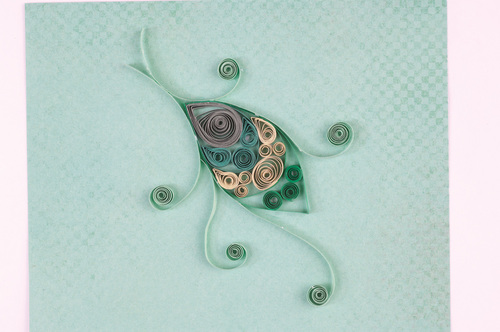
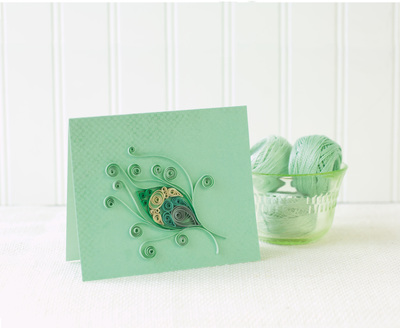
Pistachio Peacock Feather Card

If you're looking for new paper quilling tutorials, you've found the perfect project to make! The Pistachio Peacock Feather Card is a completely gorgeous handmade card that everyone would appreciate.
Quill a stunning peacock feather in shades of green with this simpler-than-it-looks project. Don't stress over creating an exact replica.
Just follow the step-by-step instructions, knowing that each result will be as unique as the exotic bird that inspired this piece!
When finished, this card would make an excellent birthday card or a greeting card for any occasion. You will love making this beautiful project!
Estimated CostUnder $10
Time to CompleteIn an evening
Primary TechniqueQuilling
Project or Page SizeCard
Type of Paper UsedQuilling Paper

Materials List
- Mint cardstock for card base
- Nearly solid patterned mint paper for background
- Quilling strips in 5 assorted shades of green
- Cutting mat
- Ruler
- Craft knife
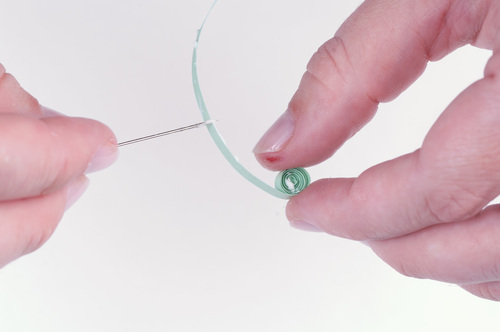
- Quilling needle
- Straight pin
- Glue
- Scissors
- Bone folder
- Cut papers
- From mint cardstock, cut a 5-1/2" × 8" (14cm × 20.3cm) rectangle
- From background paper, cut a 5-1/2" × 4-1/2" (14cm × 11.4cm) rectangle
Instructions:
-
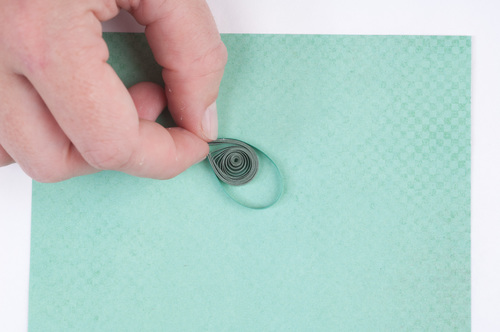
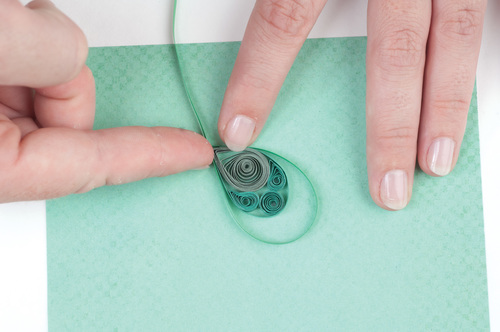
Select 1 quilling strip in the darkest shade. Coil the entire strip, pinch 1 end to form a teardrop shape and glue in place on the background just below and to the right of the center.
-
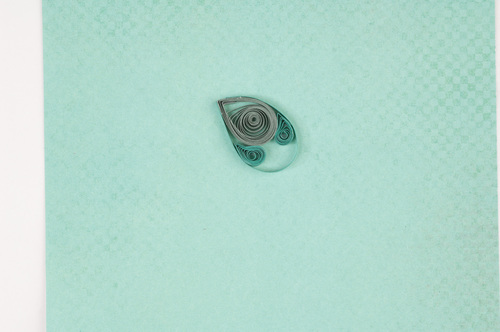
Select 1 quilling strip in the next darkest shade. Align 1 end with the point of the existing teardrop and wrap the strip around loosely so that it echoes the shape of the teardrop, leaving approximately a 1/4" (6mm) gap between the top of the teardrop and the top curve of the strip. Trim to size and glue in place.
-
Coil two 6" (15.2cm) lengths of the same green strip. Glue and pinch 1 end into a curved teardrop shape. Glue in place between the teardrop and the strip applied in Step 2. Coil a 6" (15.2cm) round and glue it in place between the 2 teardrops in the gap.
-
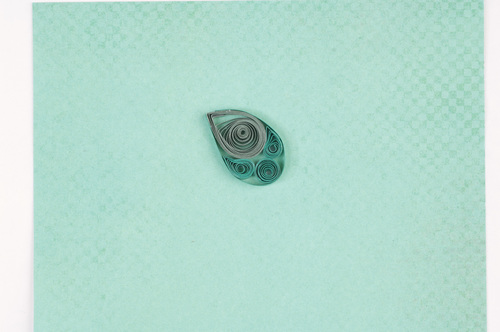
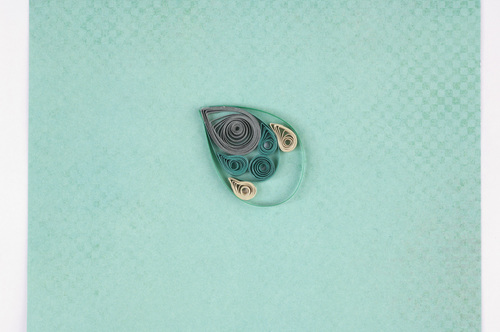
Cut a length from the third color of quilling strip. Trim if needed and glue it in place, echoing the last-created teardrop shape.
-
Create 2 teardrop shapes from 6" (15.2cm) strips of a fourth color and glue in place, nestling the teardrops into the outer points of the gap created in Step 4.
-
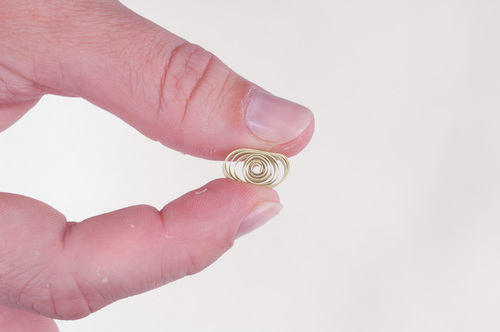
Quill a round coil from a 7" (17.8cm) strip of the fourth color, then gently squeeze in the edges to form an oval shape. Glue into place at the center of the gap, leaving a space between the oval and the teardrop shapes from the previous step.
-
Cut two 4" (10.2cm) strips from the fourth color and coil each half in opposite directions. Do not allow the coils to relax much; glue them in place to fill the gap between the oval and teardrop shapes, filling the remaining areas of the current teardrop shape.
-
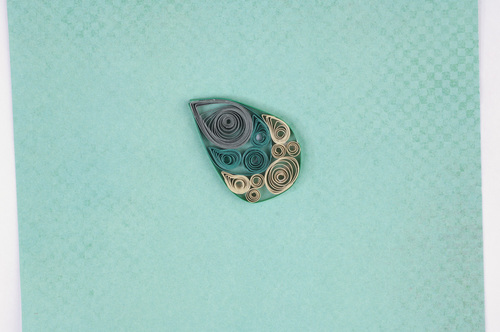
Cut a strip from the third color that is long enough to outline the entire quilled teardrop shape. Glue in place, then pinch the top edge to create the pointed tip of a feather.
-
Create 3 round coils from 5" (12.7cm) lengths of the third color and glue in place, centering the coils in the final gap.
-
Cut a 6" (15.2cm) strip from the fifth lightest color and coil about halfway down the strip. Remove the coil from the needle, then gently slide the remaining straight tail between your finger and the quilling needle to form a slight curve.
Use a straight pin to apply a small amount of glue to the back of the coil and the edge of the tail, then glue in place so that the tail extends below the bottom point of the feather. -
Repeat Step 10 on the opposite side, forming the illusion of a feather stem.
-
Continue curling and applying loose accents in the fifth, lightest color until the desired fullness of the feather is achieved.
-
Fold the mint cardstock in half and crease with a bone folder to create the card base. Adhere the card front to the base.


Read NextPretty DIY Embossed Greeting Card
Your Recently Viewed Projects
Thanks for your comment. Don't forget to share!
KLC
Jun 02, 2017
This is one of the most beautiful quilling projects I've ever seen. I think it's just stunning. Someone special is going to get this.
Report Inappropriate Comment
Are you sure you would like to report this comment? It will be flagged for our moderators to take action.
Thank you for taking the time to improve the content on our site.