Mock Embroidery DIY Birthday Card

Do you love delicate embroidery designs but lack hand sewing skills? Then you'll adore this beautiful birthday card project! This Mock Embroidery DIY Birthday Card is the ideal birthday card for your family member that loves sewing and needlework.
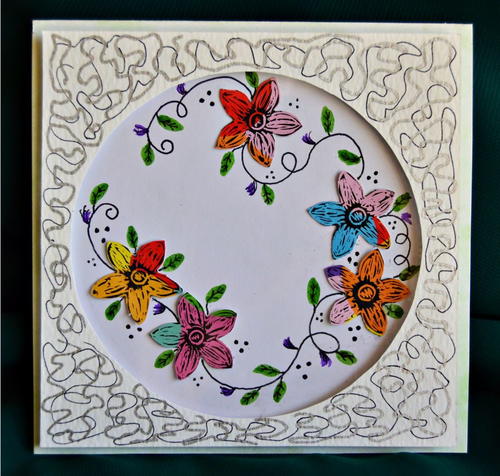
This pretty and flowery DIY card features a mock embroidery design as the main feature, with a cardstock frame to further enhance the design. It's a great way to make the birthday girl feel special!
Plus! Are you searching for even more birthday card ideas? Be sure to sign up for our free eNewsletter, The Paper Post!
Estimated Cost$11-$20
Time to CompleteIn an evening
Primary TechniqueGeneral Paper Crafting
Project or Page SizeCard
Type of Paper UsedCardstock

SeasonSpring
Project TypeMake a Project
Materials List
- 9” x 4.4” light green marbled cardstock
- 4.2” x 4.2” white textured cardstock
- Sheet of ordinary white printer paper
- Overhead transparency film
- A5 sized multicolor scratch art paper board
- Self-adhesive 3D foam squares
- Artline Fineliner 0.4mm black pen
- Pilot silver marker pen
- Felt-tip pens in green and purple
- Small floral stencil
- Quick-drying craft glue (such as Bostik Clear)
- Wooden bamboo skewer
- Plastic lid with a diameter of 3.4”
- Standard scissors
- Pencil
- Eraser
- Ruler
Instructions:
-
Score the 9” x 4.4” light green marbled cardstock to create a card sized 4.4” x 4.4”.
-
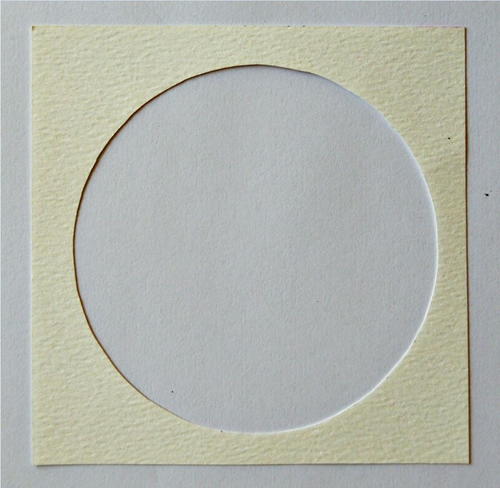
Place the plastic lid on the white textured cardstock. Use the pencil to trace a circle on to the cardstock and cut out the inner circle. This will be the “frame” for the card.
-
Cut a piece slightly smaller than 4.2” x 4.2” from the transparency film, and glue it to the back of the white cardstock frame.
-
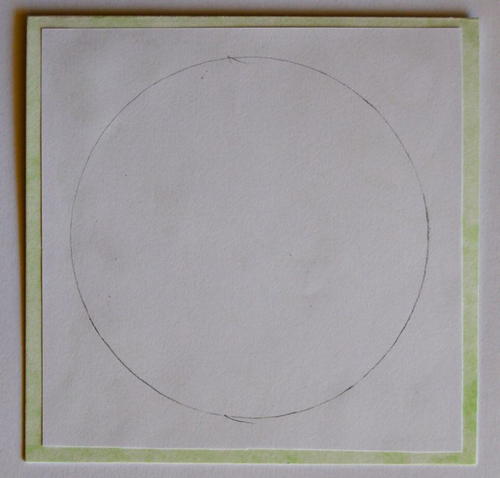
Cut a piece slightly smaller than 4.2” x 4.2” from the printer paper, and with the fold at the top, center and glue this piece of printer paper to the front of the card.
-
Lightly draw a temporary pencil circle on the printer paper that corresponds with the frame’s circle.
-
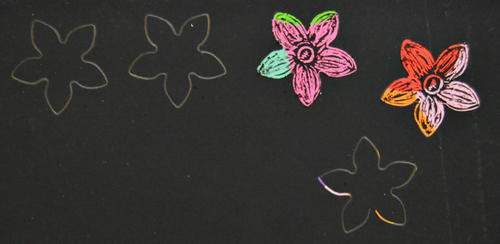
Place the stencil on the scratch art paper board and use the pencil to trace five small flowers on to the paper board.
-
Use the bamboo skewer to scratch over the pencil lines and to add more detail to the flowers.
-
Cut the flowers out and glue them inside the temporary circle.
-
Use the black pen and link the flowers with ink vines.
-
Use the green felt-tip pen to add small leaves to the vines. Use the black pen to add detail to the leaves. Draw small purple blossoms on the vines, and add some detail with the black pen.
-
Add black dots between the vines, and erase the temporary circle.
-
Decorate the white cardstock frame with silver and black squiggles.
-
Use the 3D foam squares to adhere the frame to the front of the card.

What's your favorite flower? Let us know below in the comments!
Read NextLet's Celebrate Pop-Up Diorama Card