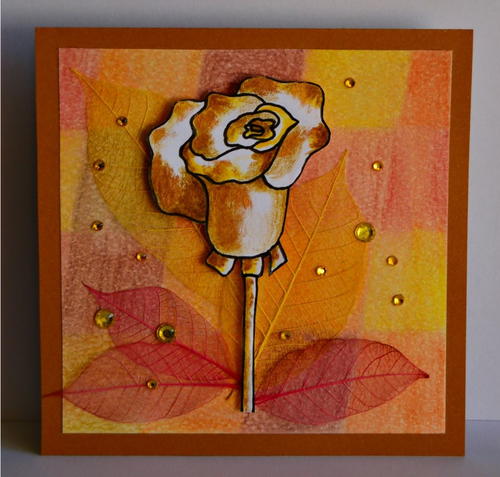
Fall Rose DIY Birthday Card

Bring the beauty of fall flowers inside with this stunning DIY birthday card made in rich autumn hues. This golden mini adult coloring project is a perfect way to celebrate the fall season! Using the lush colors associated with everything seen in nature, this card will be an enchanting way to shower blessings on a friend having a birthday during the season of abundance. Show off your card making skills by designing this pretty birthday card for fall.
Estimated Cost$11-$20
Time to CompleteIn an evening
Primary TechniqueMixed Media
Project or Page SizeCard
Type of Paper UsedCardstock

SeasonFall
Project TypeMake a Project
Materials List
- Printout of the provided mini adult coloring project - Click above to download the free printable PDF
- 10” x 5” caramel colored cardstock
- 8.2” x 7” 140GSM watercolor paper
- Two 3.5” long yellow skeleton leaves
- Three 2.4” long red skeleton leaves
- Self-adhesive 3D foam squares
- Three 5mm yellow multifaceted rhinestones
- Eleven 2mm yellow multifaceted rhinestones
- One round cotton pad
- Newspaper to protect the working area
- Dala bronze antique rub
- 24-color set of Marco Raffine watercolor pencils
- Small bottle of surgical spirit
- Quick-drying craft glue (such as Bostik Clear)
- Fine paintbrush
- Standard scissors and/or embroidery scissors
- Pencil
- Ruler
Instructions:
-
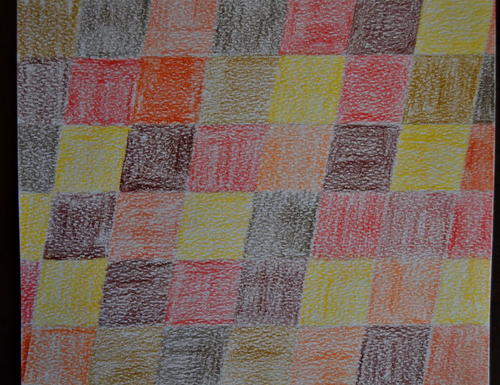
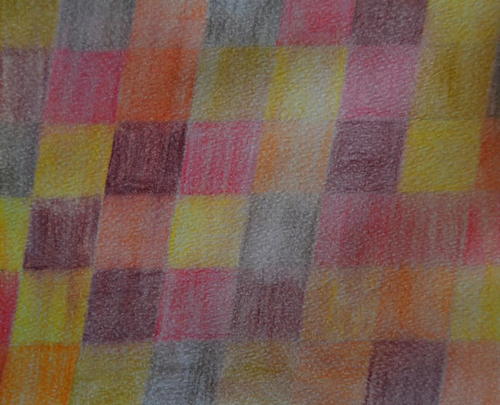
Use the pencil and ruler to lightly draw parallelograms on the whole piece of watercolor paper.
-
Working dry on dry, use the following Marco Raffine watercolor pencils to color the parallelograms: 505; 506; 508; 510; 553; 558; 560 and 563. Do not use the same color for parallelograms that are directly adjacent.
-
Wet the cotton pad with surgical spirit and rub over the colored paper, rubbing only in one direction. This will soften and blend the colored parallelograms. Allow to dry thoroughly.
-
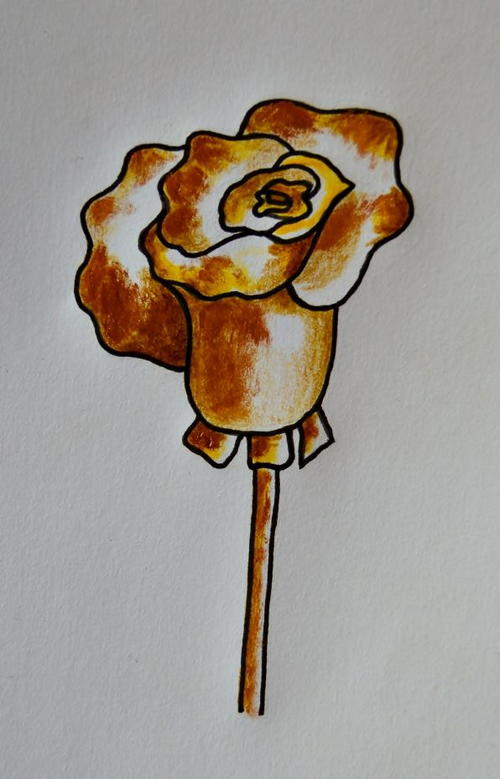
Color the rose - use only pencils 505 and 553 ~ leaving enough “light pockets.” Use the paintbrush to paint antique rub on some areas of the rose. Once completed, cut out the colored rose.
Tip: Embroidery scissors might come in handy to cut smaller curves. -
Score the 10” x 5” caramel colored cardstock to create a card sized 5” x 5”.
-
Cut a piece sized 4.4” x 4.4” from the colored watercolor paper. With the fold at the top, glue this to the front of the card.
-
Glue the skeleton leaves to the front of the card.
-
Use self-adhesive 3D foam squares to affix the rose to the front of the card. You may have to cut some of the squares smaller so that they do not protrude beyond the stem of the rose.
-
Glue the rhinestones in random positions around the rose.
Read NextReach for the Stars Birthday Card
Your Recently Viewed Projects

Thanks for your comment. Don't forget to share!
jadoredior
Jul 17, 2017
This card is so pretty. The colors definitely get me in the mood for fall weather!
Report Inappropriate Comment
Are you sure you would like to report this comment? It will be flagged for our moderators to take action.
Thank you for taking the time to improve the content on our site.