Metallic Moroccan Stencil Decor
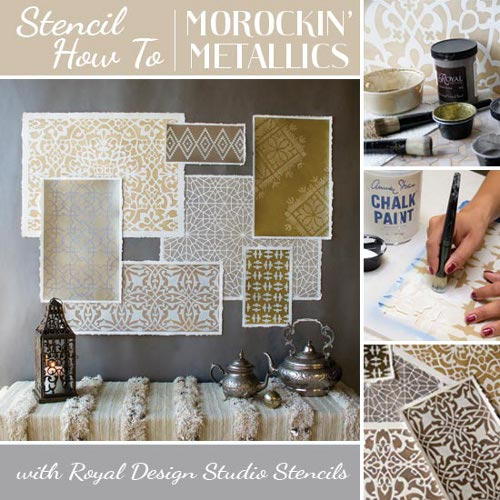
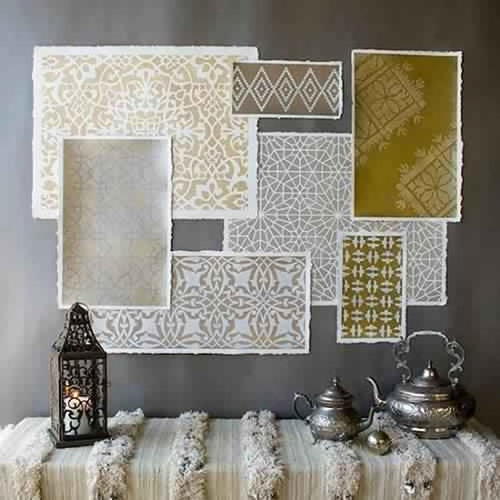
Create a stunning piece of DIY home decor with the Metallic Moroccan Stencil Decor tutorial. This amazing tutorial will add a modern touch to your living space. Learn how to stencil on thick watercolor paper, and use gorgeous metallic paints in a variety of colors to create a striking effect. Experiment with layering the completed tiles in a variety of ways. Be sure to complement these tiles with pretty furniture and tabletop decorations. Your guests will be amazed to discover you painted these tiles yourself! You can't beat DIY home decor projects like this one.
Time to CompleteIn an evening
Primary TechniqueStenciling
Type of Paper UsedTextured Paper

Materials List
- Royal Design Studio's Bird Tile Moroccan Stencil
- Royal Design Studio's Starry Moroccan Night Stencil
- Royal Design Studio's Moroccan Roundabout Border
- Royal Design Studio's Hexagons Border Moroccan
- Royal Design Studio's Small Tangier Lattice
- Royal Design Studio's Palace Trellis Stencil
- Royal Design Studio's Fez Blanket Moroccan Stencil
- Royal Stencil Creme paints*: Bright Gold, Antique Gold, Pearl Oyster, Smoked Oyster, Antique Silver
- Pure White Chalk Paint® decorative paint
- 2" Foam Brushes
- 1" and 1.5" Stencil Brushes
- 22" x 30" heavy watercolor paper (purchased from Michaels)
- Blue low-tack Painter's Tape
- Drywall T-Square or other metal straight edge
Instructions:
For this project, custom stencil creme color combinations include:
Champagne: 1x Bright Gold + 1X Pearl Oyster + .25X Smoked Oyster
Medium Gold: 1X Bright Gold + 1X Antique Gold
Light Oyster: 1X Smoked Oyster + 1X Pearl Oyster
-
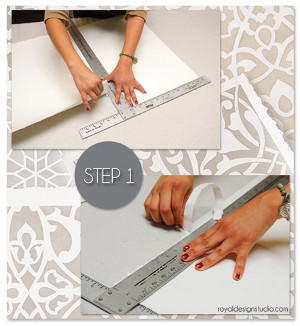
The sheets of watercolor paper naturally have a beautiful irregular edge which provides a nice organic frame for the stenciled artwork. If you are using a full sheet of paper you can simply proceed to Step 2. If you want to create a smaller sheet of paper, you will need to recreate that torn edge on each side of your smaller sheet. Use a large straight edge (we used a T-square designed for drywall installation) and simply tear the paper along the straight edge to separate it into smaller sizes. Also, tear off a small strip around the edges where the paper has a straight cut on it.
-
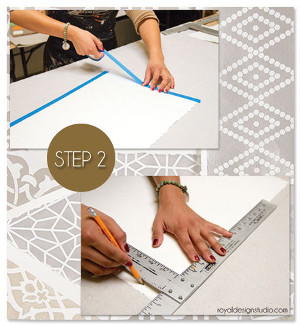
Create a squared-off rectangle within the torn edges. Use the T-square (or similar) to measure in about a half inch or so and create nice square corners with a soft pencil. Run Painter's Tape outside of that line to create a clean-edged tape "frame". Now you are ready to either start to stencil (if you want to incorporate the natural white background like we did with our Palace Trellis Moroccan Stencil) OR apply a layer of Stencil Creme paint to the background if creating a tone-on-tone stencil treatment. For our Moroccan artwork, we combined a bit of both techniques for more interest and variation.
-
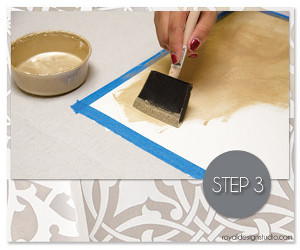
Use a foam brush or foam roller to apply two or more coats of metallic Stencil Creme paint to the background. You can use the colors straight from the jar, play with your own creative color mixes, or follow our color mixes above.
-
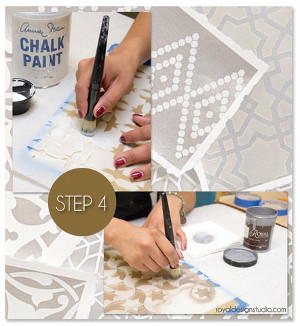
For stenciling over our painted metallic backgrounds we used Pure White Chalk Paint® on some and various custom mixes of Stencil Creme paints on others.
-
Once the stencil fun is over the design fun begins! After playing with an arrangement on a floor or large tabletop, use low-tack double sided foam squares from 3M to affix the stenciled watercolor paper to your wall. Alternatively, you could fix them to the wall with decorative push pins. We began our design with our larger pieces of paper and then played with the smaller pieces over them to get a nice, balanced mix of sizes and colors throughout our wall art installation.
NotesNOTE: Royal Stencil Creme paints are now available in 2oz. AND 8oz. sizes. If you are doing a larger project, Royal Design Studio recommends checking out the 8oz. sizes.
Read NextBeautiful Rolled Book Page Wreath


