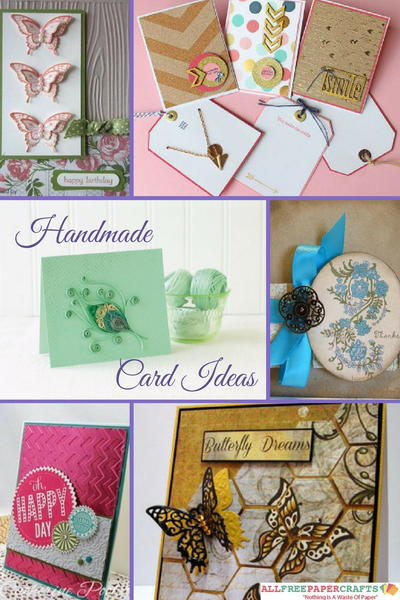
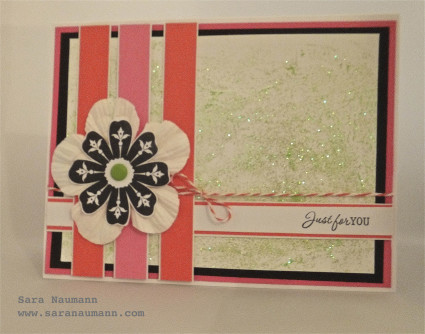
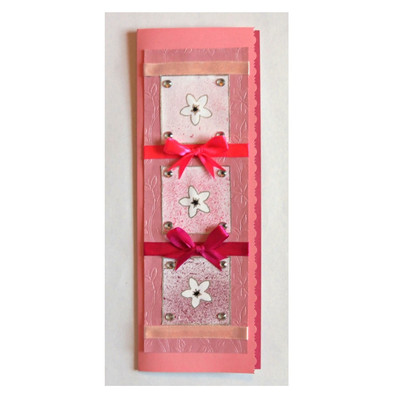
Pink Ombre Flower Card
Create a pretty pink card for the girly girl in your life when you make the Pink Ombre Flower Card. This homemade greeting card features splatter painting with a toothbrush to create the three flower tiles. Add different shades of pink ribbon and pink cardstock to create an ombre birthday card. This girly pink card will bring a smile to the recipient’s face. Use it for any occasion you'd like! Make your friend feel special with this new twist on the ombre theme.

Materials:
- 9.7” x 7.1” Pink Cardstock
- A4-sheet of Pink Floral Embossed Paper
- 9.7” x 3.45” Dark Pink Cardstock
- 3x 2” Squares Cut from Ordinary White Printer Paper
- Leftover Piece of Cardstock
- 3 Shades of 0.3” Wide Pink Satin Ribbon
- Upikit Decorative Stickers
- Large Petal Palm Punch from Xcut (code xcu 261811)
- Acrylic Paint in the Following Colors: Plum; Sweet Memories (Pink) and Mother of Pearl Rose
- Pilot Silver Marker Pen
- Artline 750 Laundry Marker
- Elmer’s Poster Tack
- Old Toothbrush
- Standard Scissors
- Pattern Edged Scissors with Seagull Pattern
- Quick-drying Glue
- Pencil
- Ruler
- Sheet of Newspaper to Protect the Working Area
Instructions:
1. Use the leftover piece of cardstock and punch three flowers with the petal punch.
2. Use a small piece of Poster Tack to lightly affix a flower to each 2” square.
3. Cover the work area with a sheet of newspaper. Dip a slightly wet toothbrush into the plum acrylic paint. Hold the toothbrush over one of the squares with the brittles of the brush facing down. With your forefinger fan the paint covered bristles. The paint will spatter over the square in small speckles. Keep fanning the bristles until the whole square has been covered with speckles.

4. Repeat step 3 with the second square, using the sweet memories acrylic paint, and then repeat step 3 with the third square, using the mother of pearl rose acrylic paint.
5. Allow the squares to dry thoroughly before carefully removing the flowers and the Poster Tack.
6. Use the silver marker pen to highlight the leaves of the flowers, and use the silver marker pen and the laundry marker to add a center to each flower.
7. Score the 9.7” x 7.1” pink cardstock in half to create a card sized 9.7” x 3.45”.
8. With the fold at the left, cut the right side of the front of the card with the pattern edged scissors.
9. Cut a piece sized 8.6” x 3” from the pink floral embossed paper.
10. Wrap four pieces of ribbon around the pink floral embossed paper, and glue each piece in place.
11. Center and glue the piece of floral embossed paper to the front of the card.
12. Glue the three flower squares in place on the front of the card at the top, the mother of pearl rose flower, the sweet memories flower in the middle and the plum flower at the bottom.
13. Add a decorative sticker to the corner of each square.

14. Make a bow with the two darker ribbons and glue the bow on each matching ribbon.
15. Glue the 9.7” x 3.45” dark pink cardstock on the right side of the inside of the card.
Read NextOne-Sheet Printable Pop-Up Cards
Your Recently Viewed Projects
Thanks for your comment. Don't forget to share!
Dana N
Jun 20, 2014
I really like that this card is such a unique size, and ombre anything is awesome!
Report Inappropriate Comment
Are you sure you would like to report this comment? It will be flagged for our moderators to take action.
Thank you for taking the time to improve the content on our site.