Bouncing Baby Scrapbook Idea

Whether you have a pregnant friend or you're the expecting mother-to-be yourself, you're going to want to document every moment of that baby's first year. What better way to memorialize their first moments than with this Bouncing Baby Scrapbook Idea? This scrapbook layout uses clay embellishments, making it a fun mixed media project for you to sink your fingers into. Whether the baby is still a few months away or it's already made its way into the world, you'll want to get started on this scrapbook page as soon as possible.
Estimated Cost$11-$20
Time to CompleteIn an evening
MaterialsClay
Primary TechniqueScrapbooking

Project TypeMake a Project
Materials List
- 1 bar SculpeyIII clay
- Sculpey Acrylic Roller, 8"
- Sculpey Super Slicer Set, w/comfort handles
- Sculpey Etch 'n Pearl, set of 3
- Sculpey Style & Detail Tools, set of 3
- Coordinating 12 x 12 Scrapbook Paper- Solids and Patterns
- Ribbon
- Twine
- White Paper Flowers
- Acrylic Paint: Cream and Burnt Umber
- Cornstarch
- Paint Brush and Foam Brush
- Rubber Stamp
- Moistened Paper Towel
- Paper Cutter or Scissors
- Sanding Block
- Flower Punch
Instructions
Do not use unbaked clay on unprotected furniture or finished surfaces. Start with clean hands and work surface area. Good work surfaces include wax paper, metal baking sheet, or disposable foil.
-
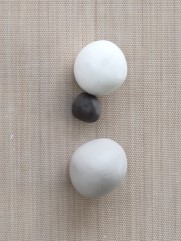
Knead clay until soft and smooth. For best results, clean your hands in between colors. Shape clay, pressing pieces together firmly. Bake on oven-proof glass or metal surface at 275 °F (130 °C) for 15 minutes per 1/4” (6 mm) thickness. For best baking results, use an oven thermometer. DO NOT USE MICROWAVE OVEN. DO NOT EXCEED THE ABOVE TEMPERATURE OR RECOMMENDED BAKING TIME. Wash hands after use. Baking should be completed by an adult.
Begin by preheating oven to 275 °F (130 °C). Test temperature with oven thermometer for perfectly cured clay. For best results, condition all clay by running it through the clay dedicated pasta machine several passes on the widest setting. Fold the clay in half after each pass and insert the fold side into the rollers first. -
Condition 1/2 bar of Ballerina. Dust desired letters on Alphabet Mold using a paint brush and cornstarch. Tap out excess.
-
Press a VERY SMALL ball of Ballerina into the desired letters. Smooth edges and be sure clay is level with the top of the mold. Press clay out of mold by putting pressure on back side of mold.
-
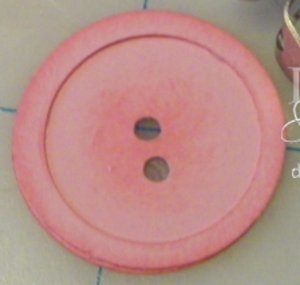
Roll out a 1/8” thick sheet of Ballerina with the acrylic roller. Cut out 10 hearts with the heart mini cutter. Set four aside. Use Etch 'n Pearl to put holes into three hearts to create buttons.
-
Texture the 3 remaining hearts. Use the smallest ball on the Style & Detail tool to create polka dots, a paint brush to create a stipple effect and the straight edge of the Style & Detail tool to create lines.
-
Condition one part Suede Brown to three parts White clay. Mix together to create a very pale gray color.
-
Roll out a 1/8” thick sheet of the grey color with the acrylic roller. Set the Alphabet Stamper to say “ADORABLE”. Press all letters close together. Hold stamper straight and press gently into surface of clay. Set the Alphabet Stamper to say “SWEET”. Press all letters close together. Hold stamper straight and press gently into surface of clay
-
Use the Super Slicer to cut around each word, making it a small strip
-
Condition and roll out a 1/8” sheet of Sky Blue. Apply a dusting of cornstarch to rubber stamp, press stamp into surface of clay to create design texture. Cut three circles using Circle Crinkle Cutter.
-
Bake all clay embellishments according to the manufacturer's instructions. Allow to cool completely. Once fully cool apply burnt umber colored acrylic paint to top surface of word tags making sure to press paint deep into words. Use moistened paper towel to remove excess paint. Add additional paint if needed to be sure the paint fills words stamped on clay to really bring out the detail.
-
Apply cream colored acrylic paint to top surface of Sky Blue circles. Allow to dry fully. Sand tops to reveal details.
-
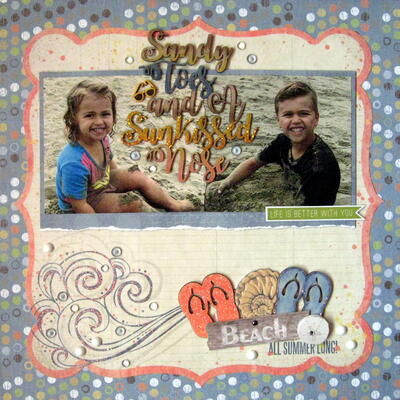
Cut a solid color sheet of card stock to 11 1/2” x 11 1/2”. Next cut a patterned sheet of cardstock to 11 1/2” x 7”. Adhere the pattern sheet to the bottom of the solid colored piece. Set aside. Cut another solid colored sheet of cardstock to 11 1/2” x 3 1/2”. Cut a 6”x6” piece of patterned paper in half and layer it on to the solid color you just cut. Tie a ribbon around the bottom of this strip. Adhere this strip to the seam of the other sheet you previously created.
-
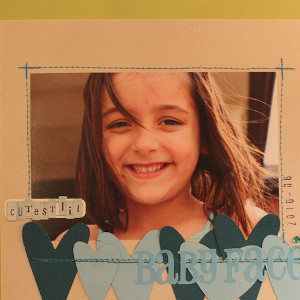
Choose your photo size and create a layered mat based on that size. Measure your photo. Make the first mat out of a patterned paper with a 1/8” border around the picture. Then create a larger mat with cream cardstock that has a 1/4” border around the picture. Glue photo and paper layers together. Adhere the the photo to the page overlapping the patterned paper strip.
-
Tie short length of twine through the three clay buttons. Adhere clay buttons to white paper flowers. Embellish right bottom corner of photo with flowers. Punch out three flowers from cream cardstock. Adhere to Sky Blue clay circles. Glue the letters onto the flowers. Adhere pieces to left of photo. Adhere remaining hearts to top panel of page. Adhere word strips onto pink patterned paper strips. Trim “v” notch into ends of paper. Adhere to complete page.
-
Place clay in freezer for a few minutes to allow clay to harder slightly. Remove from freezer and press clay out of mold by putting pressure on back side of mold.


Read NextMini Eco-Friendly Scrapbook