Paper Crafts: How to Make Paper
 Have you ever wanted to learn paper making? If you are reading this, then there's a good chance you use a lot of paper in your crafting. It's such a versatile material with many varieties for different uses. Cardstock, construction, scrapbooking, and tissue are some of the most popular crafting papers, but the list is long. With all these types of paper available, many of us might not think about making paper on our own. Well, that's about to change with Paper Crafts: How to Make Paper.
In this guide, we will start with a quick overview of the steps, then explain the types of paper you can use to make the pulp, the other paper making supplies you need, the paper making process, and even provide you with some tutorials for making your own paper. It's not a difficult skill to learn, but it does take time and some experimentation. Because there are so many paper product options, ways to process, and materials to use, making your own paper will be an adventure to find what works best for the kind of paper you desire. Homemade paper is, in general, a little thicker than standard paper but it can be much more beautiful if you add colors, flowers, or other embellishments.
Download a free copy of our eBook, How to Make Paper Flowers: 8 Pretty Paper Flower Tutorials. It will delight you. We have compiled unique and beautiful paper flower projects that we think you will love. One of the most exciting aspects of these projects is that each paper flower tutorial is unique and uses different types of paper. There are cardstock and crepe paper flowers, newspaper and book flowers, and tissue paper flowers.

Paper Crafts: How to Make Paper
Table of Contents
Quick Overview of Paper Making Steps
Types of Paper
Paper Making Supplies
Paper Making Process
Tutorials for Making Your Own Paper
Quick Overview of Paper Making Steps
-
Gather supplies.
-
Tear your paper into small pieces and soak in water or blend with a blender, food processor, or mortar and pestle.
-
Fill a container halfway with water.
-
Add your pulp mixture to the water. Add starch and add-ins if desired. Mix together.
-
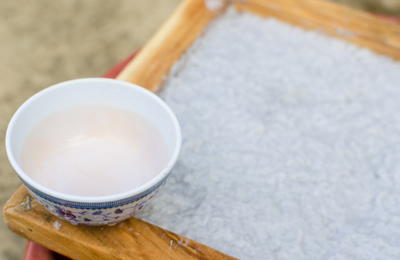
Submerge your frame into the pulp and, while it is horizontal, slowly pull the frame up so that it catches the pulp mixture. Shake frame slightly from side-to-side to evenly distribute the pulp inside the frame and allow the excess water to drain.
-
Place the frame on a flat surface. Set a towel or similar piece of fabric on top of the pulp mixture (your paper) and apply a sponge to the other side of the towel to soak up more water, which will help your paper to dry.
-
Once the paper has dried enough for you to remove it from the frame (but not completely dry), pick it up, remove air bubbles, and fix edges as needed.
-
Leave to dry.
Find out how paper is made with our Paper Making category page. Paper Making is an exciting craft to master. Use these tutorials to learn about making handmade paper that you'll love to show your friends. You'll find projects, articles, and more to help you on your journey to making all sorts of paper products from scratch!
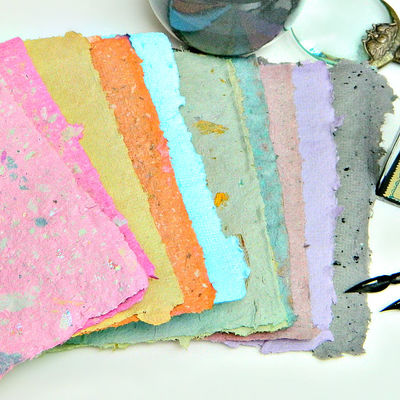
Types of Paper

You can use a variety of paper products to create new paper. Each one has its own positives and negatives and will provide you with different looks for your finished paper. Below are just a few of the possible paper products that you can use for making paper.
Printer Paper
Some types of paper are already recycled, but this paper is often brand new and the purest white of all paper. Using this paper will give you a cleaner look because of the color. This category would also include junk mail, which always makes fantastic recycled crafts.
Newspaper
Newspaper is very thin, which means it breaks down quickly. It does contain acid, so it will yellow over time. Though you can use newsprint that does not contain ink, if you use normal newspaper, the ink will bleed and your finished product will be grayer in color.
Cards
Cards are some of the thickest paper products, and will give you a unique look in your final product. Depending on the colors of the cards, you could have a colorful piece of paper in the end. Because cards are thick and glossy, these pieces will take longer to break down into pulp.
Tissue Paper
Like newspaper, tissue paper is very thin and will break down without much trouble. You have a lot of color options with this paper product, too. Because it is very thin, you may need more of it for breaking down in order to create a decent size of paper in the end.
Book Pages
Handmade paper making using book pages is a fantastic idea. Book pages are great if you don't mind destroying a book. Depending on the age of the book you are using, the final product could be whiter or more yellow. The ink will also add some gray shades into the final paper product.
Other Add-Ins

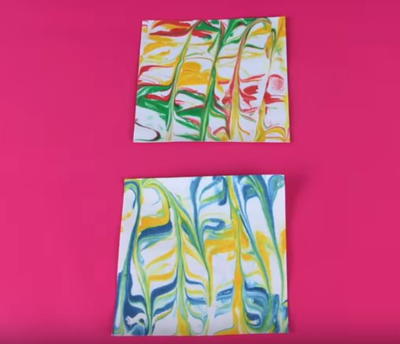
Along with some sort of paper base, you can also add in some "embellishments" to make your new paper even more unique. Flowers and other plants and herbs, along with string, glitter, and confetti. You can also add dye to make your paper any color you want. However, you do want to keep these things to a minimum and consider that they may have an effect on your paper consistency.
Paper Making Supplies
Besides paper scraps, you will need a few more items to successfully accomplish making paper. There are a few different options for most of these supplies, and, as always, you can buy or DIY most of your supplies, depending on your skills and budget.
Basic Household Items
Water
You will need water to make your pulp. It's best to use filtered water so that there aren't a lot of contaminants, rust, or heavy build up that could have an effect on your finished product.
Tub
You will also need a storage container big enough for the size of paper you wish to create. This can be a deep baking dish or some sort of tub. Keep in mind that it does need to be deep enough to hold the pulp and wide enough to fit the mould and deckle.
Towels
You will need an absorbent material to lay on your paper to help absorb excess water. This can be a towel, felt, fleece, or wool. You can even use napkins or paper towels.
Sponge
A sponge will be needed to remove excess water. It can be a basic kitchen or bathroom sponge.
Starch
If you plan on making paper for which to write on, you will want to add corn starch or liquid starch to the pulp mixture. This makes the paper sturdier, thus easier to write on. It also prevents the inks from the paper scraps from blending too much.
Rolling Pin
When partially dry, use a rolling pin to flatten the paper, which also helps remove any air bubbles or bumps.
Mould and Deckle
A mould and deckle is a "contraption" that is essentially two frames of the same size with a screen on one. The frame with the screen is the mould, and the deckle is the other frame. You can purchase a mould and deckle at certain crafts stores and easily online. Or, you could make your own. There are many tutorials, such as a homemade version in this article, Making Recycled Paper.
Blender, Food Processor, or Mortar and Pestle
You need to break down the paper scraps into a pulp. For that, you need a blender or food processor, which makes the process quite quick. If you want to use a little elbow grease, a mortar and pestle will do the trick.
Tip: Use an old blender or food processor if you want to keep your food and crafting separate.
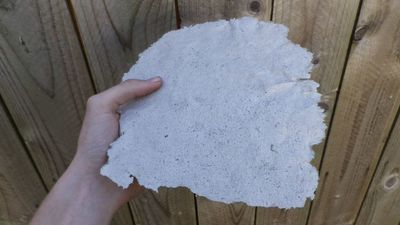
Paper Making Process
Now that you've learned what you need and some of the basic overview for how paper is made, you will learn how to make handmade paper. Make a note that if you are following a specific tutorial, use their instructions to get that type of paper. These instructions are for the general process.

-
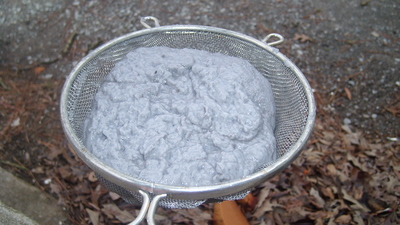
Tear up the paper into small pieces and soak in warm water for two to three hours. Some thicker paper, such as cards or bags, will need to be torn into even smaller pieces and soaked in warm water overnight or for up to three days to make them pliable enough for the pulping process. Check the paper every hour to see if it's soft and already "pulp-like". Once it is, remove the paper pieces from the water.
-
Place your wet, shredded paper into the blender, food processor, or mortar and pestle. When using a mortar and pestle, you will smash the paper pieces until the consistency you desire has been reached. Add water or paper scraps as needed. For the blender and food processor, add about half and half paper scraps and water. You may need to add more water as you blend. Start slowly by blending for 10 seconds and then checking the consistency. If there are still large pieces, blend for another 10 seconds. Continue this process until you have a fairly even consistency. If the mixture seems too thin, add a small handful of paper and blend again. Continue with this until you are satisfied. If the mixture seems too thick, add a tablespoon of water and blend. Again, continue until you are satisfied. The more you practice, the better judge you will be with your paper making!
-
Pour the pulp mixture into your tub. This is where some practice and skill becomes helpful. The thicker the pulp mixture, the thicker your sheet or paper will be. If you need to add water to the mixture, add cold water. Stir the mixture. You can also do a test sheet and see if the pulp is the thickness you want.
-
Add the starch to the mixture. For a smaller batch, add one teaspoon. For a larger batch, add two to three teaspoons. You can also stir in some of the "add-ins" mentioned above. However, you can also add these to the top of the paper after creating the sheet of paper on the mould and deckle.
-
Submerge your mould and deckle (screen side up) into the pulp and, while it is horizontal, slowly pull the frame up so that it catches the pulp mixture. Shake the mould and deckle slightly from side-to-side to evenly distribute the pulp inside and allow the excess water to drain.
-
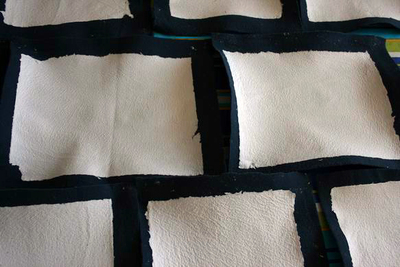
Place the mould and deckle on a flat surface. Set a towel or other absorbent material on top of the pulp mixture (your sheet of paper) and apply a sponge to the other side of the towel to soak up more water, which will help your paper to dry. You can also choose to transfer the sheet of paper directly to the towel. If you have a proper mould and deckle, remove the mould and turn the pulp side over onto the towel that is set on a flat surface. Place another towel or absorbent sheet over the paper and apply a sponge until you've taken a good amount of moisture out of the handmade paper.
-
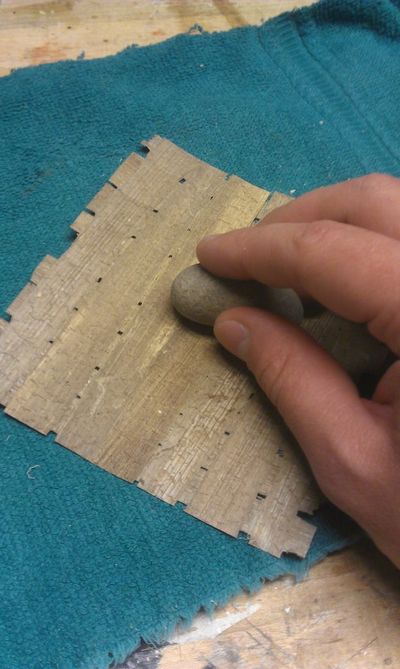
Once the paper has dried enough for you to remove it from the frame (but not completely dry), pick it up, remove air bubbles, and fix edges as needed using a rolling pin.
-
Set it on a hard surface to dry. Again, with practice, you may find that one method is better than another. You can speed up the process by using a hair dryer on low or using boards to step on the paper. Most sheets of paper will take one to three days to dry completely.
Tutorials for Making Your Own Paper

Ready to make some paper? Then check out these tutorials that will give you some fantastic ideas for how to make your own paper. Use these homemade paper pieces for card making ideas, art, and other awesome paper crafts you'll love. It's also way more budget-friendly.
Use all the paper you'll be making on some stunning paper crafts. Get a copy of our free eBook, Gorgeous Paper Crafts: 18 Card Making Ideas, Scrapbook Layouts, and DIY Paper Flowers. A handmade paper craft will always appear more thoughtful when the finished project is absolutely gorgeous! These paper ideas may take devotion and skill to complete, but you will be surprised not only by the incredible results but also by the amount of fun you have creating them.
What kind of embellishments have you added or do you want to add to your homemade paper?
Read NextPaper Crafts: Different Paper Types
Your Recently Viewed Projects
Thanks for your comment. Don't forget to share!
Report Inappropriate Comment
Are you sure you would like to report this comment? It will be flagged for our moderators to take action.
Thank you for taking the time to improve the content on our site.