Jeweled Easter Bunny Card
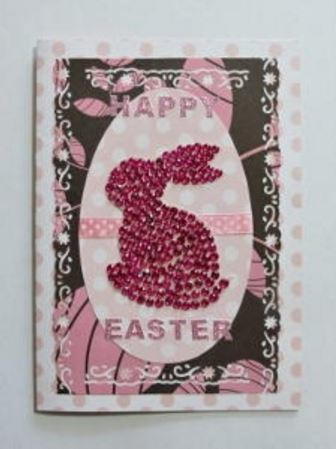
Send Easter greetings with a gorgeous handmade card this spring. Pink flat back crystals and an array of paper craft supplies will produce a beautiful Jeweled Easter Bunny Card. The many shades of pink paper and the lovely little jeweled bunny create the perfect Easter combination.
Make several homemade Easter cards in this style to send to family and friends. There will be no mistaking the occasion for this card when your loved one sees a shiny pink bunny! This handmade Easter card is a sweet and original way to send your wishes.
Estimated Cost$11-$20
Time to CompleteIn an evening
Primary TechniquePaper Crafts
Project or Page SizeCard
Type of Paper UsedScrapbook Paper

SeasonSpring
Materials List
- 12" x 12" scrapbook papers from the Tradition Collection by Crafts Concepts, product code CR 900097 (see Craft Concepts)
- 1 sheet of light pink sugar paper
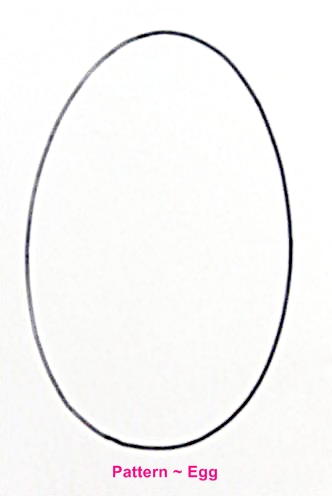
- Provided template of Easter egg (also shown below)
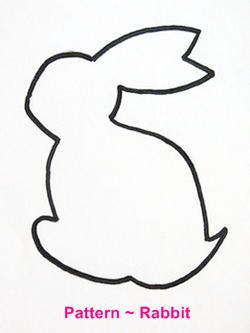
- Provided template of Easter bunny (also shown below)
- Self-adhesive pink alphabet gem stickers
- Small cerise pink flat back crystal beads, enough to cover the whole bunny
- 8" of 0.3"-wide pink satin ribbon with white polka dots
- Upikit Border Punch
- Pencil
- Ruler
- Eraser
- Glue
- Scissors
Instructions for Card:
-
From the scrapbook papers, choose the white paper with the pink polka dots and cut a piece sized 10" x 7" from this paper.
-
Score it lengthwise to create a card sized 5" x 7".
-
Now use the next piece of paper from this series, i.e. brown with pink circles. Cut a piece sized 4.6" x 6.2" and use the border punch to create a border all around this piece of paper. Use the inbuilt guide to align each part of the border before punching. Once done, the paper should have a size of 4.2" x 6.2".
-
With the fold at the left, centre and glue the paper with the punched border to the front of the card.
-
Trace the template of the Easter egg onto the pink paper with the white polka dots from this scrapbook paper series.
-
Cut out the Easter egg. Glue the ribbon across the egg and cut off any protruding edges.
-
Center and glue the egg to the front of the card.
-
Trace the Easter bunny onto the pink marbled paper, and cut it out.
-
Use glue to cover the whole bunny with the cerise pink flat back crystal beads. Allow to dry thoroughly.
Tip: Use tweezers to help move the crystal beads into their appropriate places. -
Glue the bunny to the front of the card.
-
Use the gem stickers to add the words HAPPY EASTER to the card.
-
From the sheet of pink sugar paper, cut a piece sized 9.6" x 6.6" and fold it in half. Glue to the inside of the card to write a message.

