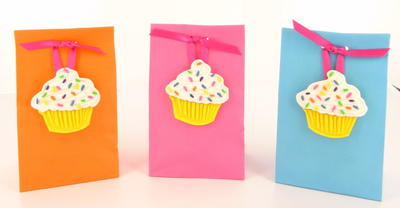
Cutest Cupcake DIY Goodie Bags

Dress up your treat bags with a sugary embellishment. These Cutest Cupcake DIY Goodie Bags are made using Sculpey and paper bags that you can buy or make. There's nothing sweeter than a cupcake and these adornments look good enough to eat.
Once you make them, you can add them to your DIY treat bags to give to your guests as they leave your birthday party or any other fun event. It's the gift that keeps giving because they can remove the cupcake and turn it into a DIY magnet, pin, or ornament.
Estimated Cost$11-$20
Time to CompleteIn an evening
Primary TechniqueMixed Media

Materials List
- SculpeyIII Individual Bars
- Sculpey Clay Conditioning Machine
- Rubber stamp - cupcake
- Party treat bag
- Hole punch
- Colored ribbon - 1/4" wide, about 12"
- Craft knife
- Glue dots, thick rubbery kind
- Spray bottle with water
Instructions:
NOTE: Do not use unbaked clay on unprotected furniture or finished surfaces. Start with clean hands and work surface area. Good work surfaces include wax paper, metal baking sheet, or disposable foil.
-
Knead clay until soft and smooth. For best results, clean your hands in between colors. Shape clay, pressing pieces together firmly. Bake on oven-proof glass or metal surface at 275 °F (130 °C) for 15 minutes per 1/4" (6 mm) thickness.
For best baking results, use an oven thermometer. DO NOT USE MICROWAVE OVEN. DO NOT EXCEED THE ABOVE TEMPERATURE OR RECOMMENDED BAKING TIME. Wash hands after use. Baking should be completed by an adult.
Begin by preheating oven to 275 °F (130 °C). Test temperature with oven thermometer for perfectly cured clay. For best results, condition all clay by running it through the clay dedicated pasta machine several passes on the widest setting.
Fold the clay in half after each pass and insert the fold side into the rollers first. -
Use 1/4 of a bar of each White and Yellow. Roll each color individually through the Clay Conditioning Machine on the #3 setting.
-
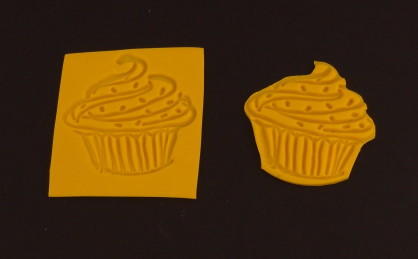
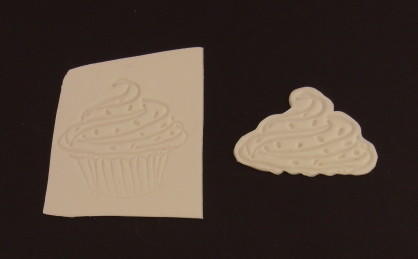
Lightly mist the cupcake stamp with water. Using the sheet of Yellow clay firmly stamp the cupcake into the clay. Using the craft knife trim around the image.
-
Lightly mist the cupcake stamp with water. Using the sheet of White clay firmly stamp the cupcake into the clay. Using the craft knife trim around the "frosting" part of the cupcake. Carefully dry each stamped image. Place the White frosting on top of the full cupcake image.
- Create very thin rolls of all the color, except White. Using your craft knife cut these rolls into 3/16" pieces. Use your finger to roll the ends slightly. Carefully place the little pieces on the White frosting, voila – sprinkles.
-
Bake the cupcake as directed above and allow to thoroughly cool.
-
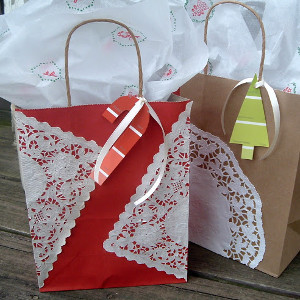
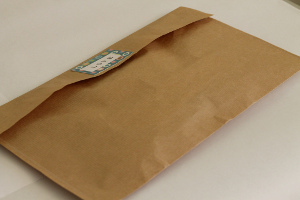
Fill your goody bag with treats and fold the op over. Punch 2 holes through the folded top of the bag. Fold ribbon in half and using a glue dot attach to back of cupcake with loose end sticking up.
Now attach cupcake to the front of the bag (folded raw edge of the top fold is in back). Pull the ribbon through the holes and then pass them back to the front.
Tie the ribbon in a double knot and trim the edges.
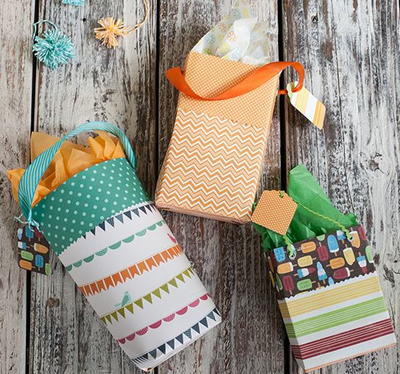
Read NextParty Time DIY Gift Bags
Your Recently Viewed Projects
Thanks for your comment. Don't forget to share!
KLC
Apr 26, 2017
I like that this project comes with a keepsake for recipients. It makes it much more special.
Report Inappropriate Comment
Are you sure you would like to report this comment? It will be flagged for our moderators to take action.
Thank you for taking the time to improve the content on our site.