Fall Acorn Birthday Card
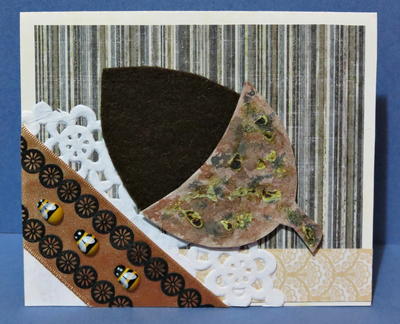
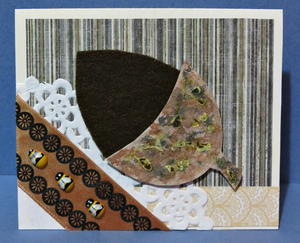
Fall season is just around the corner! Craft the Fall Acorn Birthday Card for those closest to you that were lucky to be born in the awesome autumn season. Learn how to make a birthday card, featuring one of fall's favorite symbols, for you friends and family members. This card centers around a beloved symbol of fall: the acorn. Add a fun element with a few small wooden bees, and you are ready to share some birthday greetings. If you are looking for card making ideas for fall, this the DIY birthday card tutorial that you have been looking for.
Materials:
- printout of provided pattern sheet
- 10” x 6” of light yellow marbled cardstock
- 5.4” x 4.4” cut from Rustic Dreams scrapbook paper (see www.fabscraps.co.za; Code 48 008)
- 0.7” wide strip cut from a piece of caramel colored scrapbook paper
- piece of watercolor paper
- piece of brown felt
- white round paper doily
- piece of 1.4” caramel colored satin ribbon
- 14mm wide black self-adhesive decorative lace tape
- two small 3D foam squares
- three 0.4” long wooden bees
- Staedtler 12-color watercolor set
- paintbrush
- small plastic bowl with water
- teaspoon of table salt
- box of matches
- Henkel Pattex contact glue
- quick-drying craft glue (such as Bostik Clear)
- pencil
- standard scissors
- ruler
Instructions:
- Score the light yellow marbled cardstock to create a card sized 6” x 5”.
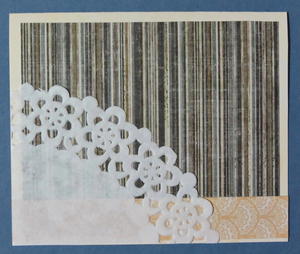
- With the fold at the top, centre and glue the piece cut from the Rustic Dreams scrapbook paper to the front of the card.
- Glue the caramel colored scrapbook paper strip to the bottom of the card and cut off any protruding edges.
- Glue the paper doily over the bottom left part of the card and cut off any protruding edges.
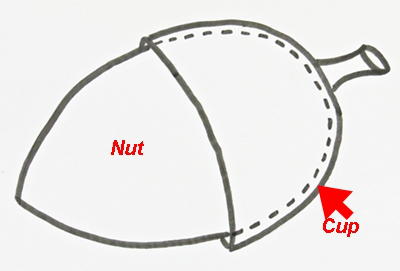
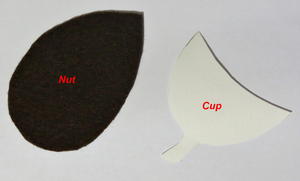
- Trace the acorn’s nut onto the brown felt and cut it out.
- Trace the acorn’s cup onto the watercolor paper and cut it out.
- Now add color to the acorn’s cup:
a. First paint the cup with the brown paint.
b. Add salt to the cup while the paint is still wet.
c. Drip spots of mixed black-brown; brown-blue and brown-ochre watercolor paint over the salt.
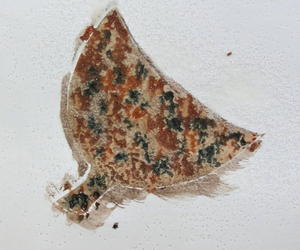
d. Allow the paint and salt to dry thoroughly, and then remove the salt by rubbing lightly over the paint with your finger.
e. Add glue lines to the cup and while the glue is still wet, set it alight with a match, and then quickly blow out the flame. Keep adding glue lines until the cup has acquired a mock wood effect. Note: Be careful that the flame does not burn the paper.
- Glue the satin ribbon to the bottom left corner of the card and cut off any protruding edges.
- Glue the acorn’s nut to the front of the card.
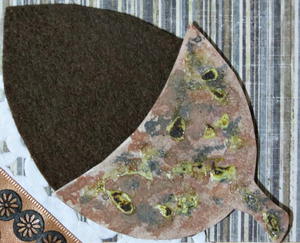
- Add the two 3D foam squares to the stem and then add glue to the back of the cup. Glue the cup in place to complete the acorn.
- Add two strips of self-adhesive decorative lace tape and cut off any protruding edges.
- Lastly, add the three bees to the card.
Read NextReach for the Stars Birthday Card
Your Recently Viewed Projects
Daughter of Light
Oct 31, 2018
I really, really like the idea of incorporating mixed media into my greeting card making! This is an example of it with felt, paper, doily, satin ribbon and lace. This method allows the card to have a wonderful 3D effect with depth and texture. I do confess that I'm quite the realist so I probably would have found an actual acorn and had it front of me to inspire my creation. That helps inspire me! Thanks for the great reminder to bring nature into my card making!!!
Report Inappropriate Comment
Are you sure you would like to report this comment? It will be flagged for our moderators to take action.
Thank you for taking the time to improve the content on our site.


