Heart to Heart DIY Journal

Your journal is a private notebook, the place where you pour your heart out and divulge your innermost secrets and thoughts. This Heart to Heart DIY Journal symbolizes the close connection you have with your journal. After all, what better metaphor for pouring your heart out than hearts on the cover? Even if you've never kept a diary before, this easy polymer clay project will have you itching to write your first entry. Why buy a generic notebook from the store when this journal cover expresses how unique you really are?
Estimated Cost$11-$20
Time to CompleteIn an evening
MaterialsClay
Primary TechniqueGeneral Paper Crafting

Project TypeMake a Project
Materials List
- 1 bar premo! Sculpey® Accents
- Sculpey Clay Conditioning Machine
- Sculpey Super Slicer Set, w/comfort handles
- Stamps: Flower Heart (GE1036), Swirl Heart (GE1073g) and Sprial Heart (GE1035g) by StampaFe Art
- Ranger's Cactus Flower Archival Ink pad
- White acrylic paint
- Journal
- Paint brush
- Craft knife
- Assorted size frosting tips
- Double stick tape
Instructions
Polymer clay may stain. CLAY MAY DAMAGE UNPROTECTED FURNITURE OR FINISHED SURFACES. DO NOT USE polymer clay on unprotected surfaces. We recommend working on the Sculpey clay mat, wax paper, metal baking sheet, or disposable foil.
-
Start with clean hands and work surface area. Knead clay until soft and smooth. For best results, clean your hands in between colors. Shape clay, pressing pieces together firmly. Bake on oven-proof glass or metal surface at 275°F (130 °C) for 30 minutes per ¼" (6 mm) thickness. For best baking results, use an oven thermometer. DO NOT USE MICROWAVE OVEN. DO NOT EXCEED THE ABOVE TEMPERATURE OR RECOMMENDED BAKING TIME. Wash hands after use. Baking should be completed by an adult.
Begin by preheating oven to 275 °F (130 °C). Test temperature with oven thermometer for perfectly cured clay. For best results, condition all clay by running it through the Clay Conditioning Machine for several passes on the widest setting. Fold the clay in half after each pass and insert the fold side into the rollers first. -
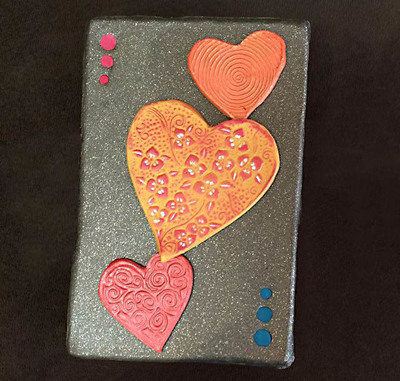
For the cover base, I mixed one part of Graphite Pearl with three parts of Yellow Gold Glitter. Run through your Clay Conditioning Machine at a medium width. Cut to fit the cover of your book using either a stiff tissue blade or a craft knife. I like to smooth the edges with my fingers and create a faint beveled edge. Set aside to work on the hearts.
-
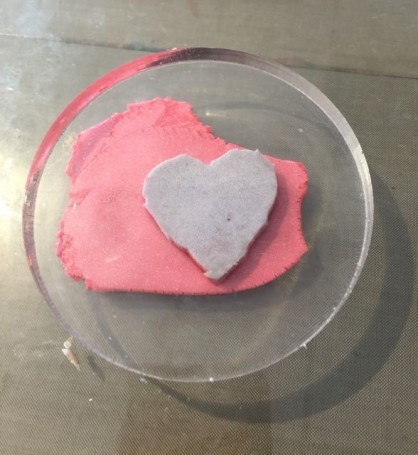
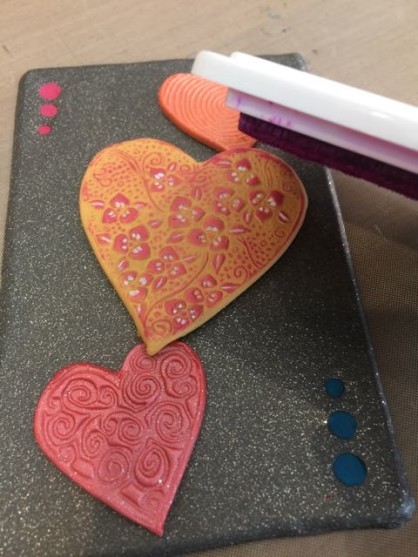
Now for the hearts: Run the Sunset Pearl clay through the Clay Conditioning machine on a medium-thin setting. Not too thin, the clay will need some body to hold itself together. Spritz the swirl heart stamp with water and press into the Sunset Pearl clay. With your craft knife, trim the heart out of the clay. Smooth the edges with your fingers.
-
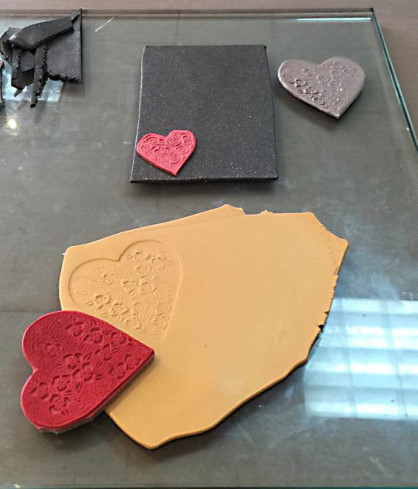
Run the 18K Gold clay through the Clay Conditioning Machine on a medium-thin setting. Spritz the Flower Heart stamp with water and press into the sheet of clay. Trim the heart out of the clay with your craft knife and smooth the hard edges with your fingers.
-
Now mix one part of Sunset Pearl and one part of 18K Gold together to make an orangey pearl color. Run this mix through the Clay Conditioning Machine on a medium-thin setting. Spritz the Swirl Heart stamp with water and press into the clay. Cut the heart out as you have with the other two hearts, smoothing the edges once you have it out of the clay sheet.
-
Position the hearts on the gray cover in a rough diagonal from one corner to the other.
-
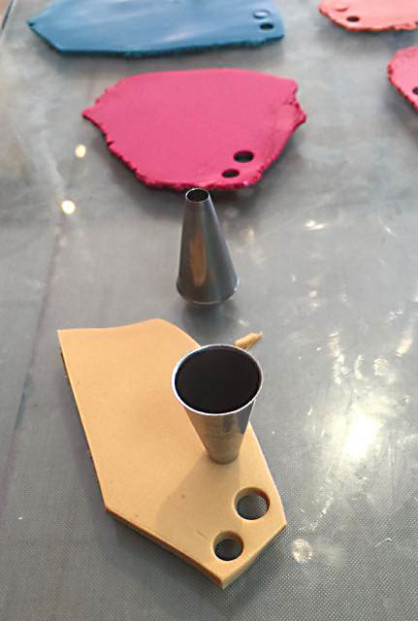
Condition both the Peacock and the Magenta clays, on the final pass through, do so at the same thickness you did your cover piece.
-
With a frosting tip, I used three descending sizes, odd numbers (i.e.11,9,7) and make three holes in the upper left corner and the lower right corner. Remove the punched clay.
-
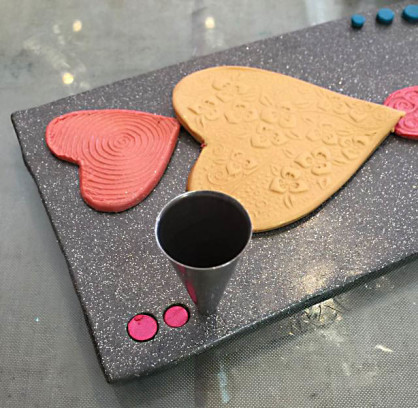
Punch out three circles with the same sizes of frosting tips from both the Magenta and Peacock clays. Carefully insert the colored punch into the holes on the cover.
-
Move your cover to a baking surface (cardboard,tile, etc.) and bake in a toaster over for 30 minutes.
-
Once it is done and cooled, paint the centers of the flowers on the big heart with the white paint. I also painted the line down the middle of the leaves.
-
Now the fun part. With a fresh or well inked Cactus Flower ink pad, gently rub the raised part of the flower heart. You are adding a light coat of magenta ink to the top of the gold clay. I use the corner of the pad for some control. Light touch is important as you don’t want to fill the lower portions of the heart in with color. The gold background and the white should stand out against the magenta color.
-
To adhere to my book cover I like to use a heavy duty double sided tape. My preference is to use the red backed tape sold under several names. Cut the tape to the size of the cover. Peel off one of the backings and stick it to the clay. Burnish to make sure the adhesive sticks. Now, peel down a portion of backing and fold it at an angle so the paper sticks out the edge
-
This provides you with an exposed and unexposed surface for positioning your cover on your journal. Using the protected portion of your cover, move it around so it sits on your journal as you want it to appear. When you are satisfied with the positioning, press the exposed end of the cover down on the journal. Grab the backing paper that is sticking out and pull it down to expose the remaining adhesive. Press the entire cover down on the journal to make sure it sticks. Done and now you have the basics for making other book or journal covers!