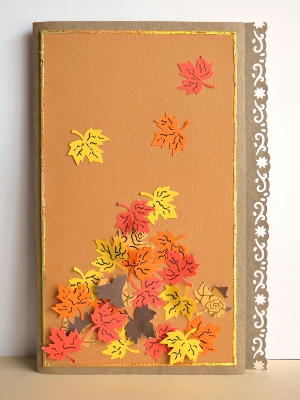
Windswept Autumn Leaves Birthday Card
Celebrate the fall season with the Windswept Autumn Leaves Birthday Card. This colorful homemade birthday card is perfect for anyone with a fall birthday! The rustic colors are beautiful for the season. The autumn leaves fluttering to the ground remind us of the changes that we see all around us in nature. Each leaf floating down brings a special wish, and the recipient of this card will experience a moment of being one with nature when receiving this card.

Materials:
- 10.2” x 7.7” Natural Colored Cardstock
- 7.4” x 4.3” Havana Brown Cardstock
- Left-over Pieces of Red, Yellow and Orange Paper
- Left-over Piece of Autumn Scrapbook Paper
- Upikit Maple Leaf Punch
- Upikit Border Punch
- Golden Craft Foil
- Foilart super-tack Glue Pen
- Artline 210 Fineliner Pen
- 3d Self-adhesive Foam Squares
- Pencil
- Ruler
- Scissors
- Clear-drying Gel Glue (such as bostik clear)
Instructions:
1. Score the natural colored cardstock so that the front flap will have a width of 4.6”, and the back flap a width of 5.4”.
2. Punch 7 maple leaves each from the red, yellow and orange papers.
3. Use the Artline 210 Fineliner Pen to add veins to these leaves.

4. Punch 7 leaves from the scrapbook paper.
5. Glue a first layer of leaves to the Havana brown cardstock.

6. Add a second layer of leaves, using the 3D self-adhesive foam squares to add some dimension. For some of the leaves, use only 3D foam squares, and for others, use a combination of glue on the one side of the leaf and a small piece of 3D foam on the other side.

7. Add Super-tack glue all around the Havana brown cardstock to make a “frame.”
8. Allow the Super-tack glue to dry for about 20 minutes. When the glue is wet, it is blue, but when it is dry it becomes transparent.
9. Press the foil down on the glue. Remember that - of course - the golden side of the foil must be on top.
10. Lightly rub the foil over the areas where you have added glue with the Super-tack glue pen.
11. Carefully lift the foil. On the areas where you have added glue with the Super-tack pen, some of the foil will stay behind, thereby creating a golden frame all around the brown cardstock.
12. With the fold at the left, centre and glue the brown cardstock to the front of the card.
13. With the fold at the left, use the Upikit border punch to create a border on the right. Use the inbuilt guide to align each part of the border before punching.
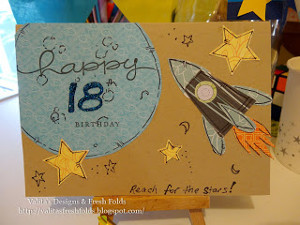
Read NextReach for the Stars Birthday Card
Your Recently Viewed Projects
Thanks for your comment. Don't forget to share!
Daughter of Light
May 30, 2018
A very, very nice concept card! The colors were chosen well and definitely give an Autumn feel. The balance is appropriate. I really like the leaves drifting upward from the pile. I also appreciate the depth given by elevating some of the leaves in the pile. The foil outline is soooo stylish right now and the gold is terrific! I think I might have carried the foil look behind the border punch to pull the look together. Overall a very pleasant card!
SissieSass
Aug 31, 2017
I cannot believe how beautiful this card is for someone that has a birthday in the fall. I love autumn colors and the way the reds, yellows, browns work well together. I would love to get this card from someone I know because I would feel loved because they made it for me by hand from the bottom of the heart.
Report Inappropriate Comment
Are you sure you would like to report this comment? It will be flagged for our moderators to take action.
Thank you for taking the time to improve the content on our site.