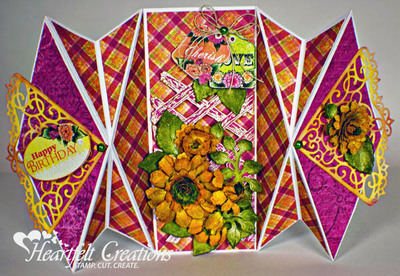
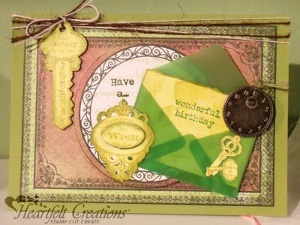
Keys and Clocks Homemade Birthday Card
Create a beautiful DIY birthday card with unique embellishments! The Keys and Clocks Homemade Birthday Card is an excellent way to send well wishes to a loved one. Use high quality steel dies to create beautiful filigree for the card. The faded colors used give this card a vintage appearance, and the green vellum envelope is a fantastic touch. Give a birthday card that your loved one will remember when you follow this excellent tutorial.

Materials from Heartfelt Creations:
- HCDP1 239 Majestic Morning Paper Collection
- HCD 741 Burnished Key Die
- 354806 Standard Circle Large
- HCPC 3569 Burnished Key PreCut Set
- HCPC 3532 Beautiful You PreCut Set
- HCPC 3507 Timeless Amour Background PreCut Set
- HCPC 3354 Classic Message PreCut Set
Other Materials:
- Old Olive Card Stock
- Daffodil Delight Card Stock
- Distress ink - Peeled Paint, Shabby Shutters and Mowed Lawn
- Versamark Embossing Ink
- Clear Embossing Powder
- Small Green Vellum Envelope
- Metal Clock Face
- Brown and White Twine
Instructions:
- Create a 7" x 5" card base from Old Olive cardstock.
- Cut the card front from the paper collection and trim to 6 1/2" x 4 1/2".
- Use the largest Spellbinder Circle to cut the center out of the frame. Glue the evacuated frame to the card front.
- Stamp the die cut circle with the Timeless Amour Background and Shabby Shutters Distress Ink. Back the circle with foam dimensionals and secure to card base.
- Glue the green vellum envelope onto the right hand side of the circle.
- Tear a small piece of Daffodil Delight into a 3" x 2 1/8" rectangle. Ink the edges with Peeled Paint Distress Ink. Use Mowed Lawn Distress ink to stamp the sentiment from Beautiful You in the center top third of the rectangle and heat emboss with clear embossing powder. Use a sponge applicator to smudge Peeled Paint Distress ink onto the surface. Insert in envelope.
- Stamp the Burnished Key Background onto Daffodil Delight cardstock using Peeled Paint Distress Ink. Heat emboss with clear embossing powder. Die cut. Ink the edges of the Journey key and the My Wish keyhole with Distress Ink and glue onto card base, as shown.
- Run a bit of green twine through the top of the metal clock face and secure to card with foam adhesive. Add two small die cut keys below the clock face. Run twine around the top of the card and through the die cut key. Tie a bow.
- For the card interior: Cut a 3 3/4" x 3" panel of the bright yellow paper from the collection and stamp with the sentiment from Classic Message PreCut set. Glue into card center.
- Cut two fishtail banners from the border pieces of the green paper and glue down. Add two more small keys.
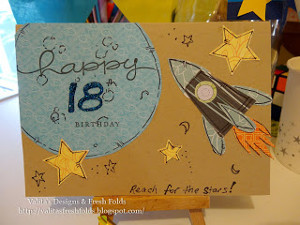
Read NextReach for the Stars Birthday Card
Your Recently Viewed Projects
Thanks for your comment. Don't forget to share!
Daughter of Light
Oct 30, 2018
I'm so thankful that artisans can line out these directions to create these cards and we can use them as springboards with what we have in our own stashes!!! I also love that we can combine crafts that we love and they work out. This Keys and Clocks Homemade Birthday card is a great example of this with combining steam punk and mixed media and greeting cards. Thank you soooooo much for inspiring us!!!
Report Inappropriate Comment
Are you sure you would like to report this comment? It will be flagged for our moderators to take action.
Thank you for taking the time to improve the content on our site.