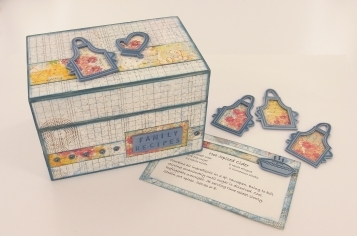
Family Secrets Recipe Box and Cards
Nothing beats a traditional recipe box. While you may love to look up recipes online or search in a cookbook for great ideas, a recipe box is ideal for collecting your favorite recipes in one place. The Family Secrets Recipe Box and Cards is a great DIY recipe box to make. Use clay and stamps in order to embellish your box and cards in a creative and adorable way. This recipe box will become a family heirloom, just like the recipes in it are passed down from generation to generation.

Materials:
- 1 Block of Premo! Accents: Pearl - 2 oz
- 1 Block of Premo! Sculpey®: Denim - 2 oz
- Clay Conditioning Machine
- Sculpey Alphabet Stamper
- Sculpey® Super Slicer
- Balsa wood recipe box
- Blue scrapbook eyelets
- Scrapbook paper 2 coordinating “blue” themed. Papers. One paper should have subdued pattern, the other splashes of coordinating colors Subdued design referred to as plain, the paper with splashes of color referred to as fancy.
- PearlEx powder - Micro Pearl
- Kitchen themed rubber stamp set – should include an apron
- Stamp pad - Versa Magic, Ocean Depth
- Magnet sheet, self adhering, trimable
- Roll on scrapbook adhesive and stron g white craft glue
- Craft knife
Instructions:
Start with clean hands and work surface area. Good work surfaces include wax paper, metal baking sheet, or disposable foil. Knead clay until soft and smooth. For best results, clean your hands in between colors. Shape clay, pressing pieces together firmly. Bake on oven-proof glass or metal surface at 275 °F for 30 minutes per 1/4 in thickness. For best baking results, use an oven thermometer. DO NOT USE MICROWAVE OVEN. DO NOT EXCEED THE ABOVE TEMPERATURE OR RECOMMENDED BAKING TIME. Wash hands after use.
Begin by preheating oven to 275 °F. Test temperature with oven thermometer for perfectly cured clay. For best results, condition all clay by running it through the clay dedicated pasta machine several passes on the widest setting. Fold the clay in half after each pass and insert the fold side into the rollers first.
1. Condition the Denim and Pearl clay. Mix the two colors to create Pearly Denim. Create a flat sheet by passing through the Clay Conditioning Machine on #4 or use the Acrylic Roller and roll clay to 1/16”.
2. Create the saying Family Recipes by stamping the word Family in the clay first. Use even pressure when stamping – no stamp pad ink needed. Then visually center the word Recipes below and stamp. If there are any imperfections around the words use your finger to smooth them out. Highlight he words by using the PearlEx powder around them. Use the Super Slicer or craft knife to trim around the words. Trim clay on index card so as not to cut your clay mat or paper working surface.

3. Using the stamp pad ink the stamps of your choice and stamp them on the clay. Stamp 4 aprons. Leave enough room around each stamped image to make trimming easy. The stamped images should be slightly indented creating a “quilted” look. Using the craft knife trim all of the images, including the inside of the apron and oven mitt (if you used one).

4. Bake all embellishments as directed and allow to cool.

5. Using fancy paper trim around all 4 aprons. Trim paper using craft knife. Using strong white craft glue adhere fancy paper to back of apron.
6. Use the stamp pad to ink all the edges of the box. Cut plain paper to fit (leaving a small border all around) the top, front panels, back panels and side panels. Ink edges of the paper. Using strong white craft glue attach papers to recipe box.
7. Cut thin strips of fancy paper to fit the top, sides and back of box. Ink edges. Add blue eyelets to strips on front and back. Don not use eyelets under area where word Family Recipes is placed in the front or the area in the back where you attach and embellishment. Attach strips using scrapbook adhesive as shown in photo.

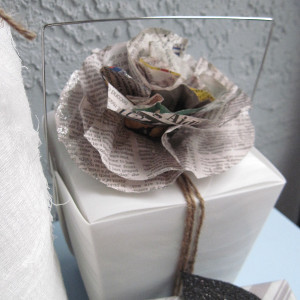
Read NextGift Wrap Newspaper Flower