Beginner's Origami Tutorial: Origami Cat and Dog
Learn the art of origami with this overview and tutorial for two basic origami shapes!

Paper origami is such a popular paper craft. The most popular and well-known shape created by paper folding is probably the Japanese paper crane. Even though it is a relatively simple design, most people might want to build up to that design with a few even simpler designs when they learn how to do origami.
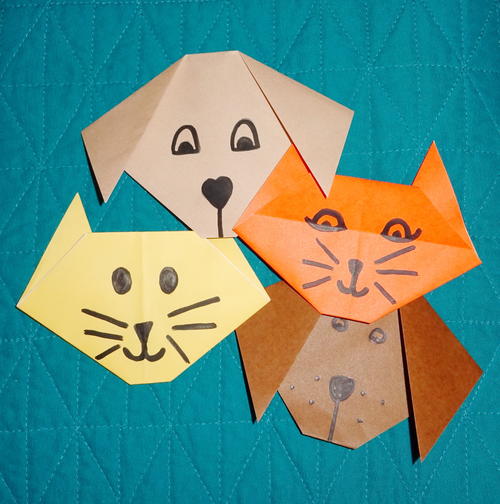
With this Beginner's Origami Tutorial: Origami Cat and Dog, we will show you step-by-step, through pictures, how to fold paper in order to create a cute origami cat and an adorable origami dog. These projects are the perfect starting points for anyone, but they are particularly great origami for kids projects. Before we start with the cat and dog tutorials, there is even an overview of origami so that you know which materials you will need to get started. It's not much!
"Making models from paper can require very few resources and take mere minutes (or even seconds) to execute. Complex designs, on the other hand, can take hours to complete." – Nick Robinson, Encyclopaedia Britannica
The name "origami" originates from the Japanese word "ori," which translates to "folding." Origami is the art of paper folding and has been popular since its beginnings in Asia and Europe. Each area has their own traditions when it comes to origami origins, which makes this craft even more exciting. Paper origami is an amazing art form because the possibilities are seemingly endless.
Mostly 3D shapes, origami paper can be folded in the most amazing ways, creating stunning shapes we wouldn't expect. From animals to furniture, there are tutorials on how to make just about anything by folding paper. These origami cats and dogs are not highly three-dimensional, but fun to make. Simple enough for anyone to fold, it's a paper project worth giving a shot.
Estimated CostUnder $10
Time to CompleteUnder an hour
Primary TechniqueOrigami
Type of Paper UsedOrigami Paper

Materials List
- Origami or other folding paper - square-shaped (3" x 3", 6" x 6", or 10" x 10")
- Flat surface for folding
- Colored pencils, crayons, markers, or pens for decoration (optional)
- Straightedge (optional)
Origami Overview:
-
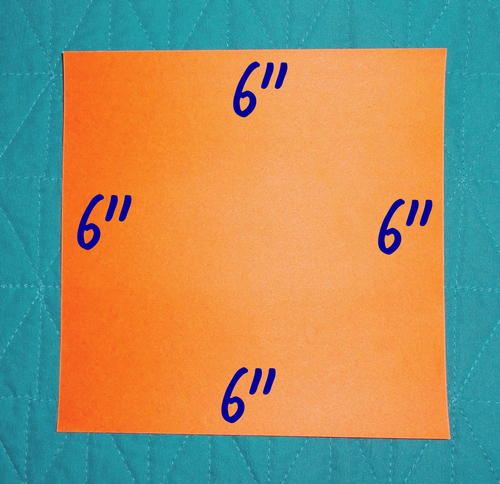
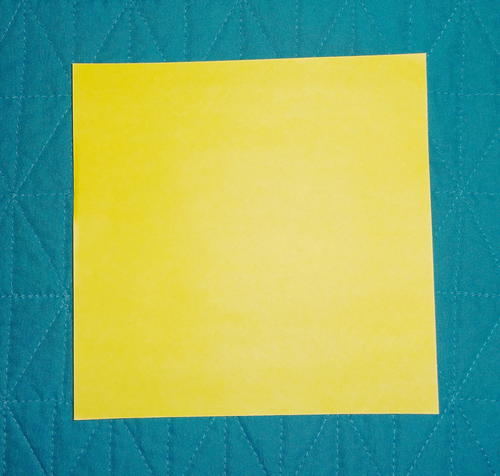
There are variations, depending on the project, but origami is primarily made using square sheets of thin paper. Sizes of paper range from 3" x 3" to 10" x 10", but the most common is a 6" x 6" sheet of origami paper (also called kami or koi paper).
Sold in packs, most origami paper is white on one side with a color on the reverse side. A 6" square is the size used with each of the following projects. With origami, thin paper is preferred because it is the easiest to fold. Though, some origami shapes can be made using paper money and foil, amongst other mediums. -
The beauty of origami is that, besides the paper, the only tools you really need are your hands. You can use colored pencils, crayons, markers, or pens to decorate the paper once you're finished, but the folded paper is pretty on its own. Once you learn origami, you can practice and create new designs, like modern origami artists experiment.
"Modern origami often features models created by designers. Many of these models are considered copyrightable material or intellectual property. Modern origami often prioritizes a puzzle aspect to the folding, and the challenge of folding a single square of paper without using cuts or glue." – Between the Folds, PBS
You also need a flat, stable surface to do your folding. Straightedges (or rulers) can be used if you want to be extremely precise, as well. Are you ready to get started on these origami pets?
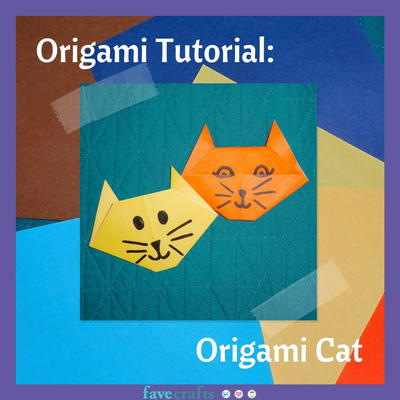
Instructions for Origami Cat:
If you are an animal-loving paper crafter, this is a basic origami project you'll love. This origami cat involves simple folding techniques with pleasant results. This cat can be made in mere minutes, which is why it is a smart origami project to start with.
The first thing you want to do is choose a color for your kitty. If you want it to be realistic, neutral colors are a great choice. Oranges and yellows also work. Though, don't be afraid to make a hot pink or crazily-patterned cat, either. It's all about fun.
-
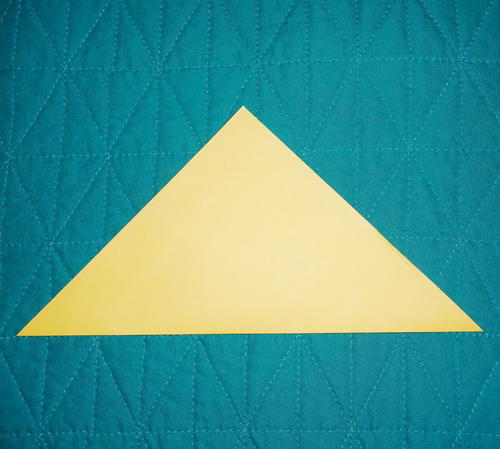
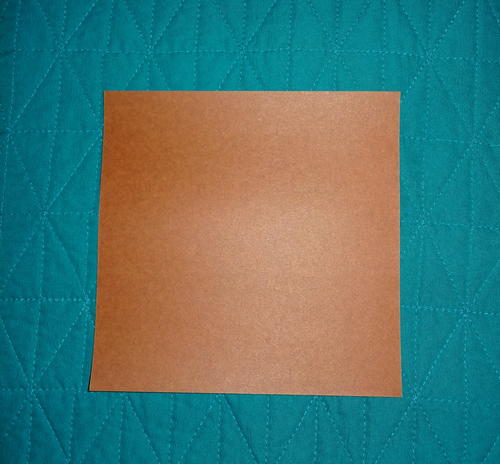
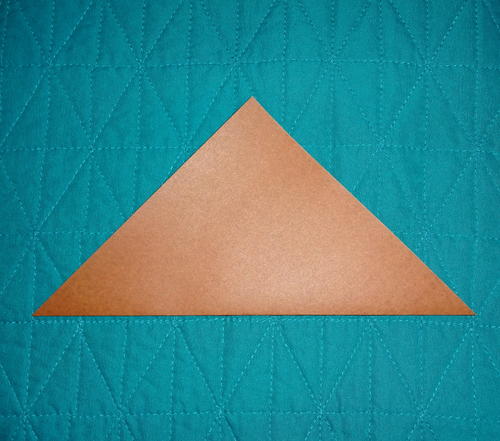
Fold your square in half so that the white or unwanted color is on the inside. It will look like a triangle, as shown below.
-
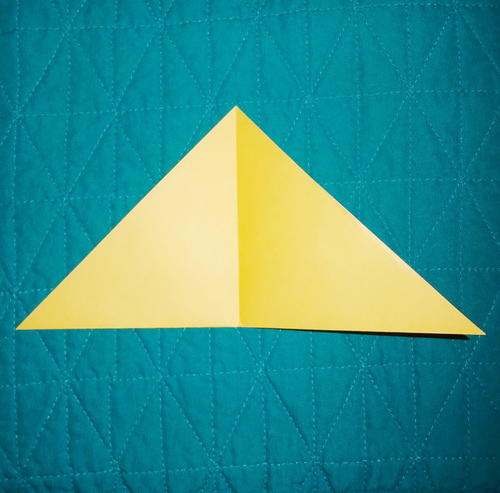
Fold your triangle in half so that it becomes an even smaller triangle, as shown below.
-
Unfold your small triangle so that it once again becomes a larger triangle, but with a center crease, as shown below.
-
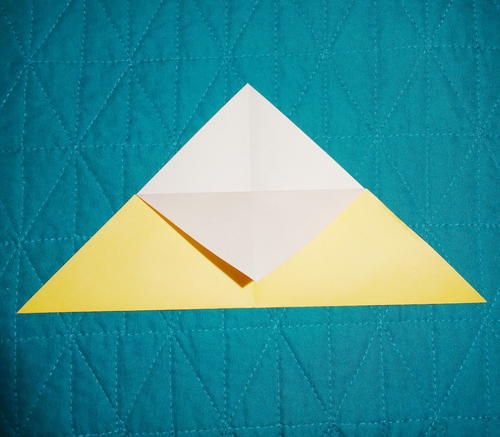
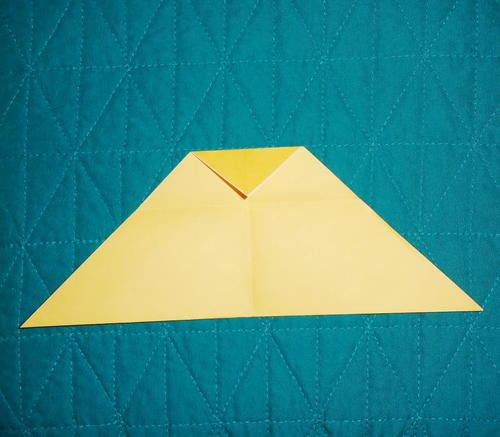
Fold down the top of the triangle on one side of the paper until the point reaches the base of the triangle, as shown below.
-
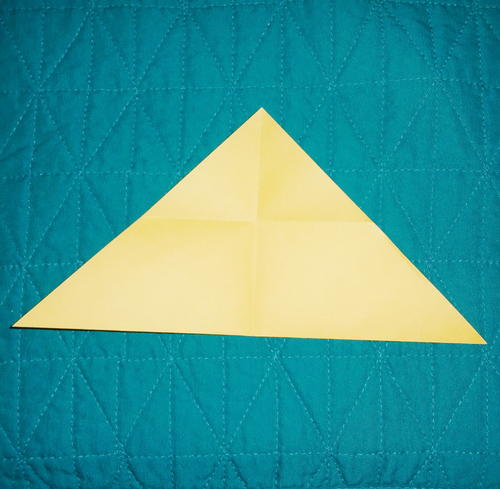
Unfold the part you just folded so that the paper is once again a large triangle, as shown below. You can see that there is a cross shape on the triangle from the creases.
-
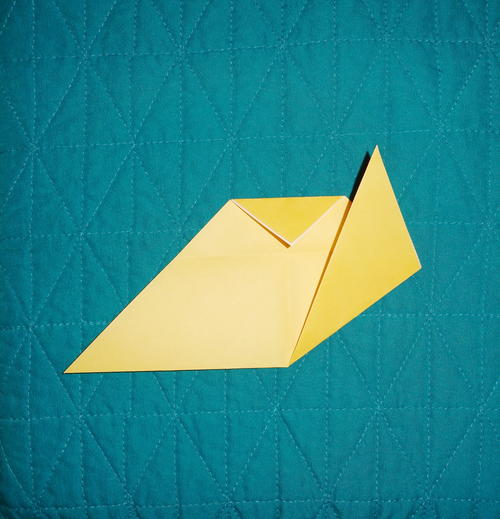
Fold down both sides of the paper that form the tip of the triangle to the horizontal crease you created in Step 4, as shown below.
-
Using the vertical crease in the center and the folded triangle at the top as your guides, fold one side of the shape up, as shown below.
-
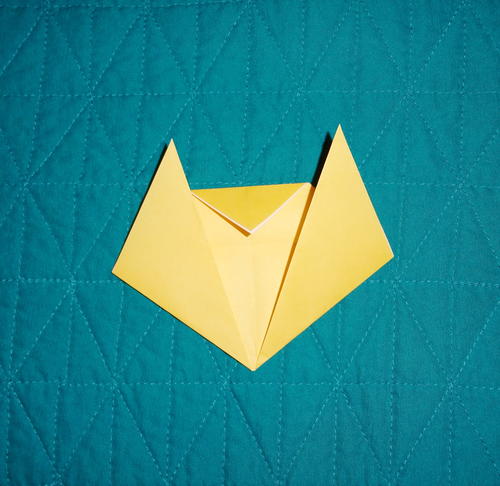
Repeat the process in Step 7 for the other side of the shape, as shown below.
-
Fold the bottom point up slightly, as shown below.
-
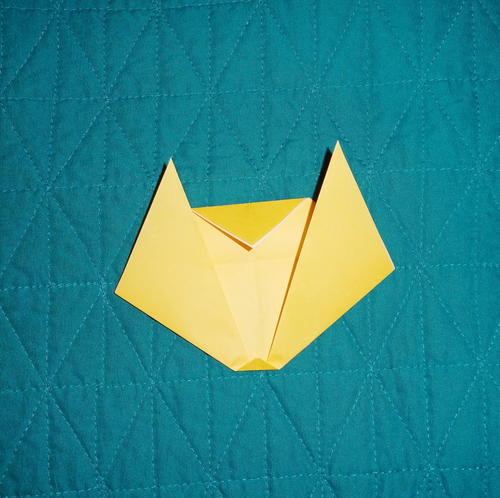
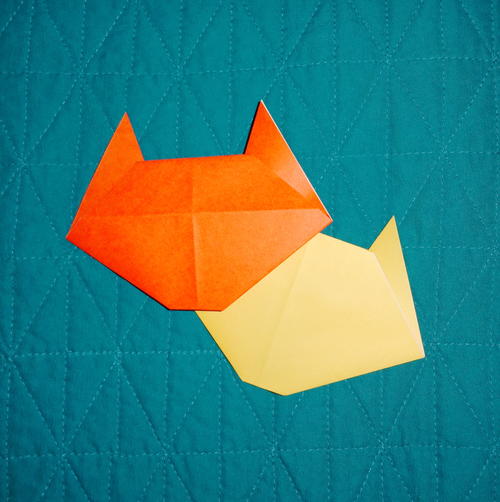
Flip the shape over. Your cat is finished!
-
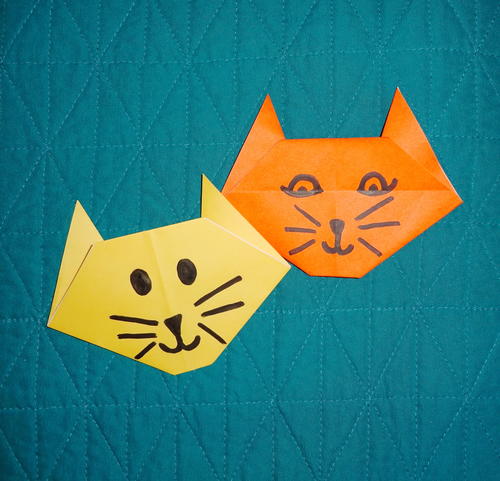
Optional: Decorate your cat as desired.

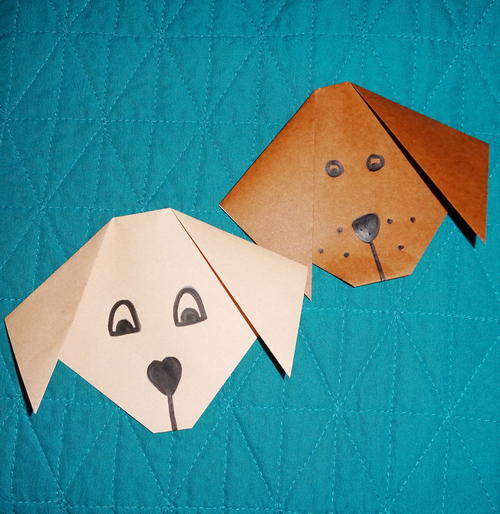
Instructions for Origami Dog:
This adorable paper origami dog has fewer steps and is even easier than the origami cat. This floppy-eared paper pup is a favorite beginner project. Once again, you can choose a neutral color, like brown, for your dog for authenticity.
If you have a dog, make a paper origami version of it! You will really enjoy folding this super easy piece of origami art and can make an entire litter in minutes.
-
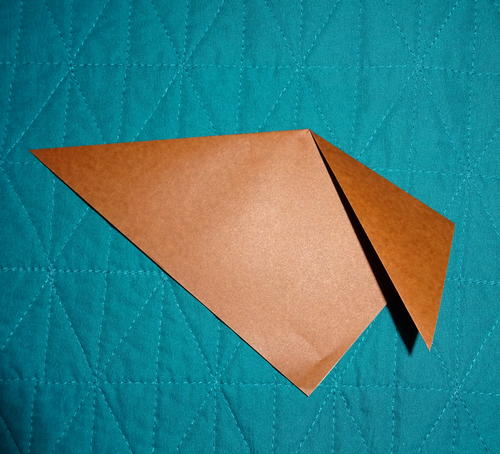
Fold your square in half so that the white or unwanted color is on the inside. It will look like a triangle, as shown below.
-
Turn your triangle upside-down so that the tip is on the bottom. Fold one side of the shape down, as shown below.
-
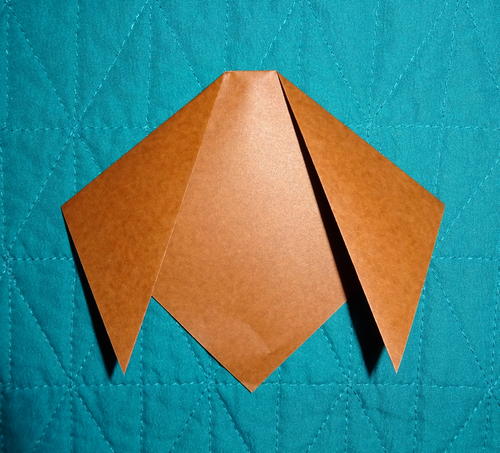
Repeat Step 2 for the other side of the shape, as shown below. These are the ears.
-
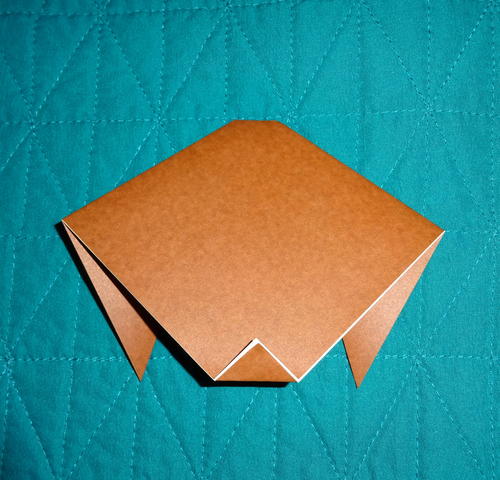
Flip the shape over and bend the small point up slightly, as shown below.
-
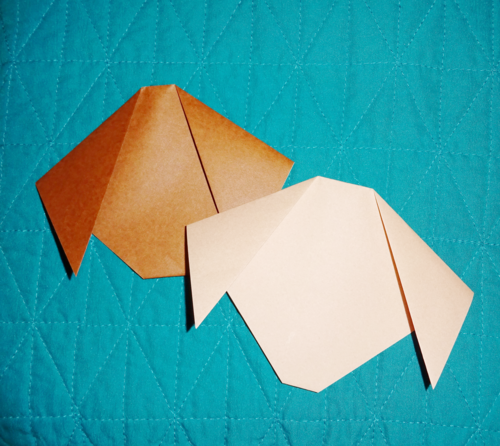
Flip the shape back over. Your dog is finished!
-
Optional: Decorate your dog as desired.
Your Recently Viewed Projects
Thanks for your comment. Don't forget to share!
Daughter of Light
Sep 25, 2018
Oh my goodness! These are absolutely adorable and look sooooo easy to do! I have a room full of card stock paper available. I think I will try some with textures to them. Eeew! I just realized that I have some of those googly eyes that would be soon sweet. These will be perfect to use as embellishments on cards and scrapbook layouts! Wow! Thanks for the inspiration!!!
Report Inappropriate Comment
Are you sure you would like to report this comment? It will be flagged for our moderators to take action.
Thank you for taking the time to improve the content on our site.