Hello Autumn Handmade Greeting Card

Fall colors are a visual reminder that the season is changing, and serves as a welcome change from the bright greens of summer. Use this as your inspiration to make this Hello Autumn Handmade Greeting Card for a friend who celebrates her birthday during this season or just to say hello during these months. The DIY card sports different textures with the focal point as an arrangement of skeleton leaves that fit with the theme. The bold colors make this handmade card suitable for both men and women, so the project is very versatile. Friends will appreciate the colorful wishes.
Time to CompleteUnder an hour
Primary TechniquePaper Crafts
Project or Page SizeCard
Type of Paper UsedCardstock

SeasonFall
Materials List
- 5.6" x 8.2" pumpkin yellow cardstock
- 5.3" x 3.6" sand-colored cardstock
- 4.5" x 3.2" orange spider web net cardstock
- A6 sized orange sugar paper
- A6 sized thin cork sheet
- 8-10 small yellow skeleton leaves
- 3 star-shaped cork stickers
- Small 3D self-adhesive foam squares
- Bronze ink glimmer mist
- Leaf-shaped paper punch
- Thin paintbrush
- Pencil
- Ruler
- Pair of standard scissors
- Quick-drying craft glue (such as Bostik Clear)
- Small plastic bowl
Instructions:
-
Score the pumpkin yellow cardstock to create a card sized 5.6" x 4.1".
-
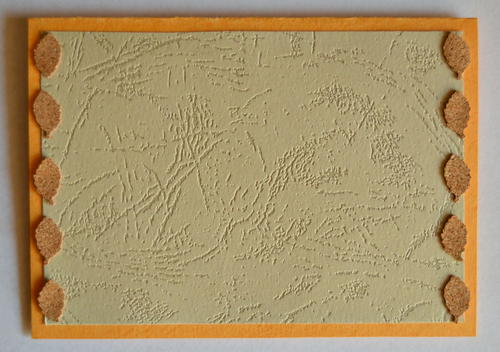
With the fold at the top, glue the sand-colored cardstock to the front of the card.
-
Punch 10 leaves from the cork sheet and glue them in place, adding a border to the left and right of the card.
-
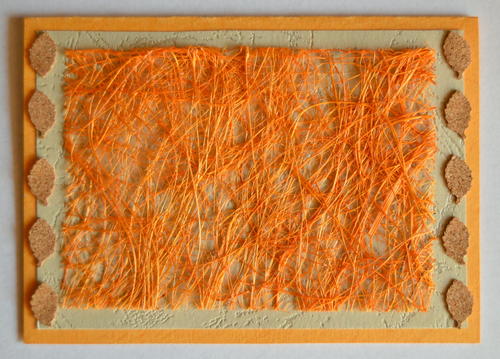
Glue the orange spider web net cardstock to the front of the card.
-
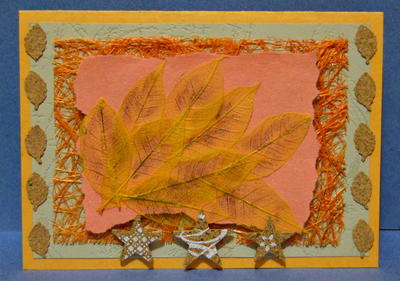
Tear the orange sugar paper smaller and use 3D foam squares to adhere the sugar paper to the card.
-
Arrange the skeleton leaves on the sugar paper and glue them in place.
-
Spray a bit of ink mist into the plastic bowl. Use the paintbrush to add some delicate color to the leaves' veins.
-
Use 3D foam squares to adhere the stars to the bottom of the card.